Abnormal Detection Application
Data Preparation
Prepare Training Set Images
- Defect-free images (mandatory): Images that do not contain any defects. It is recommended that these images account for more than 80% of the total defect-free images.
- Defective images (optional): Images containing crack or stain defects, used to assist training. It is recommended that these images account for more than 80% of the total defective images.
Prepare Testing Set Images
- Defect-free images (mandatory): Images that do not contain any defects, accounting for less than 20% of the total defect-free images.
- Defective images (optional): Images containing crack or stain defects, accounting for less than 20% of the total defective images.
TIP
- Abnormal training allows for defect-free image training. If only defect-free images are included, you may ignore the preparation of corresponding training and testing images.
- If the number of images exceeds 200, please compress them into a zip file, and the zip package should not exceed 5GB.
Create a Project
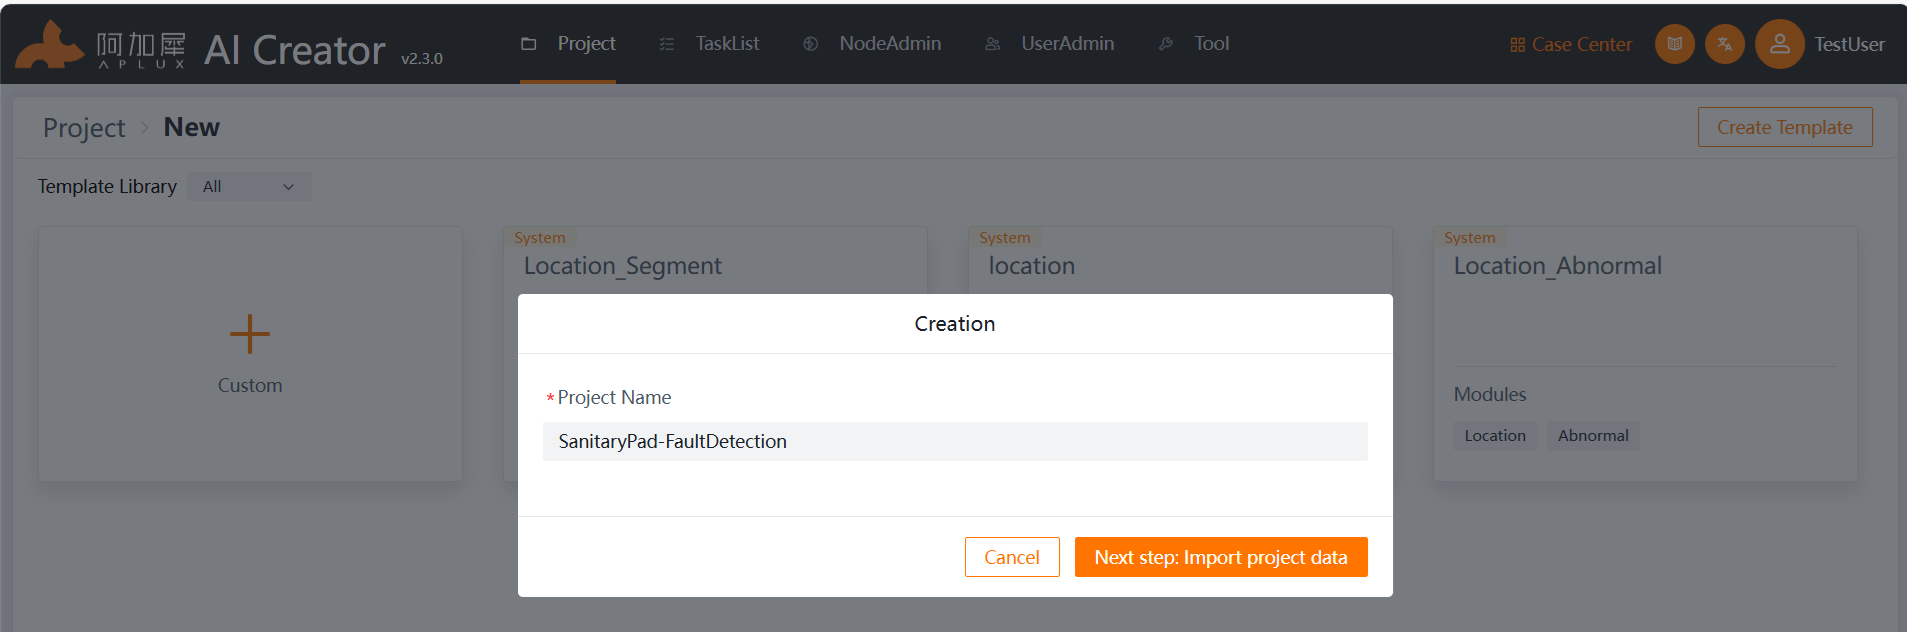
Log in to AI Creator, and click the "New" button in the project center.

Click "Custom" and enter the project name “SanitaryPad-FaultDetection” in the pop-up window for creating a new project. Click "Next steps: Import project data" to complete the project creation.
Import Dataset
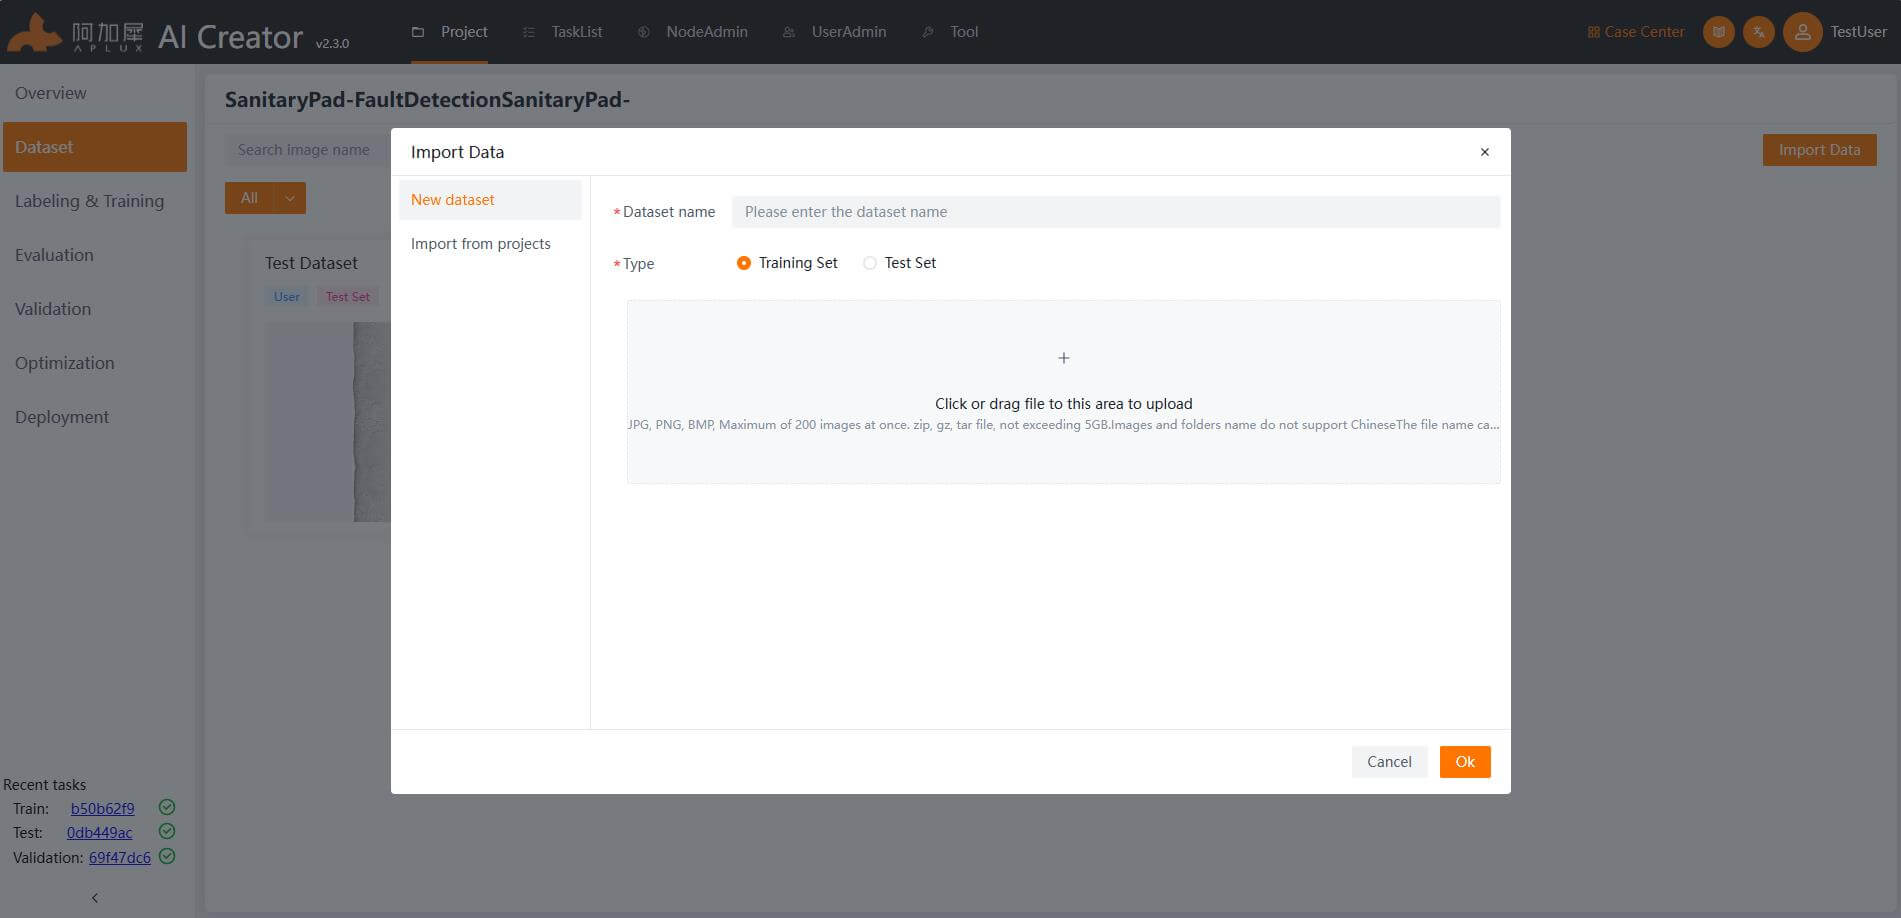
- In the left-side navigation bar, click on "Dataset".
- Upload the training and testing image sets.
- When the project is created, it automatically generates folders for the dataset image set and training data image set. Enter the training set or testing set respectively. In the training set and testing set, click "Import Image" -> "Create New Dataset", drag the images or compressed image files into the upload area, and click "OK" to import the data.
Add Algorithm Module
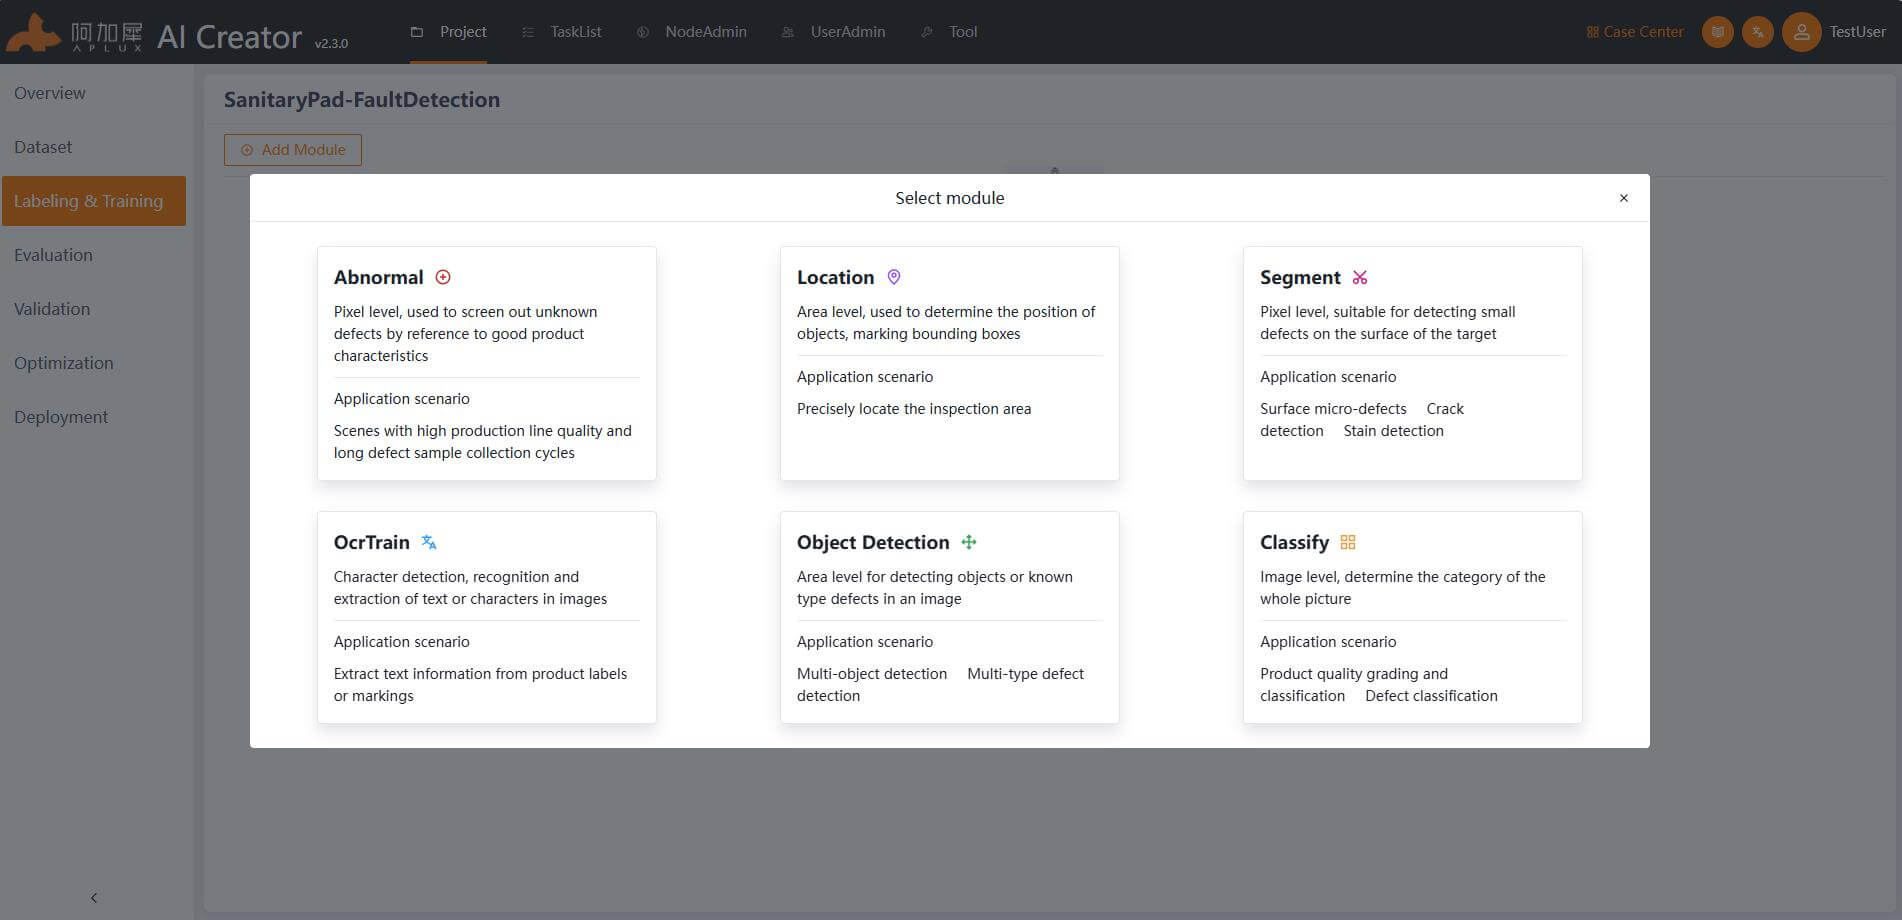
- In the left-side navigation bar, click "Labeling & Training".
- Click "Add Module", and in the module selection window, choose "Abnormal".
Associate Images
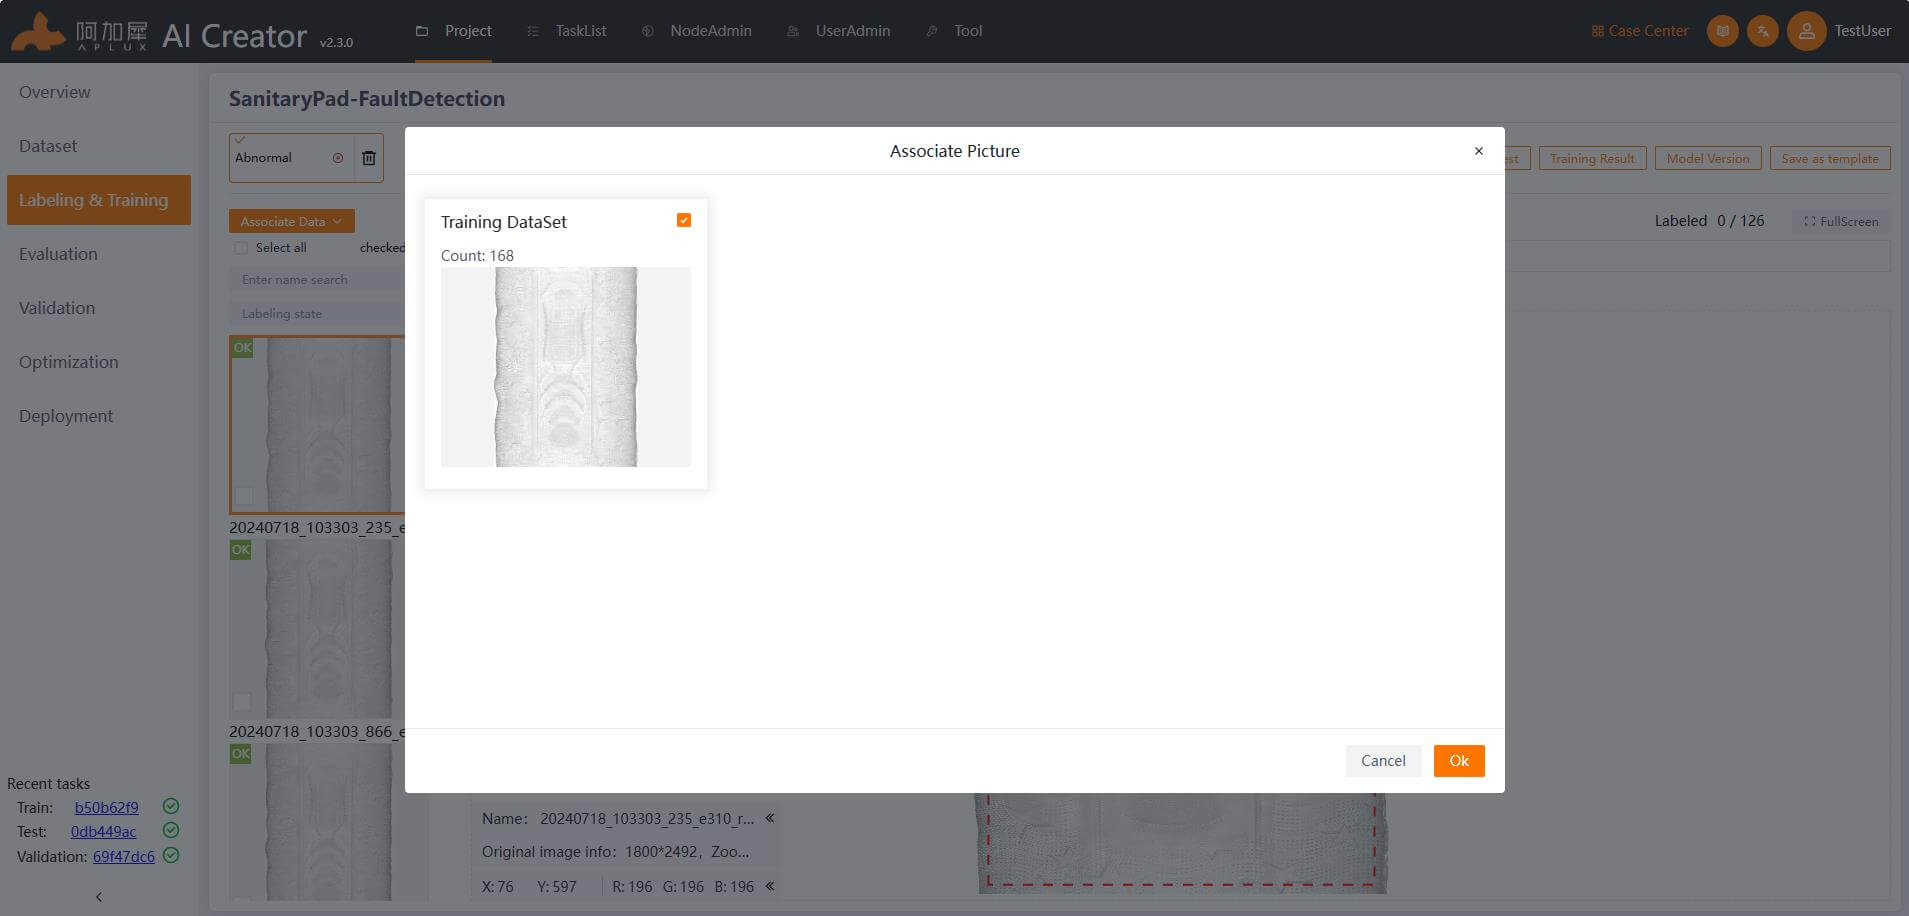
Click the "Associate Data" dropdown menu, select the "Associate" button, and in the pop-up window, select the training set. Finally, click the "Ok" button.
Data Annotation
- In the left-side navigation bar, click "Labeling & Training".
- Label the data.
If all the training images are defect-free, check the "Select All" box, and right-click on the image thumbnail to select "Set as OK Image".
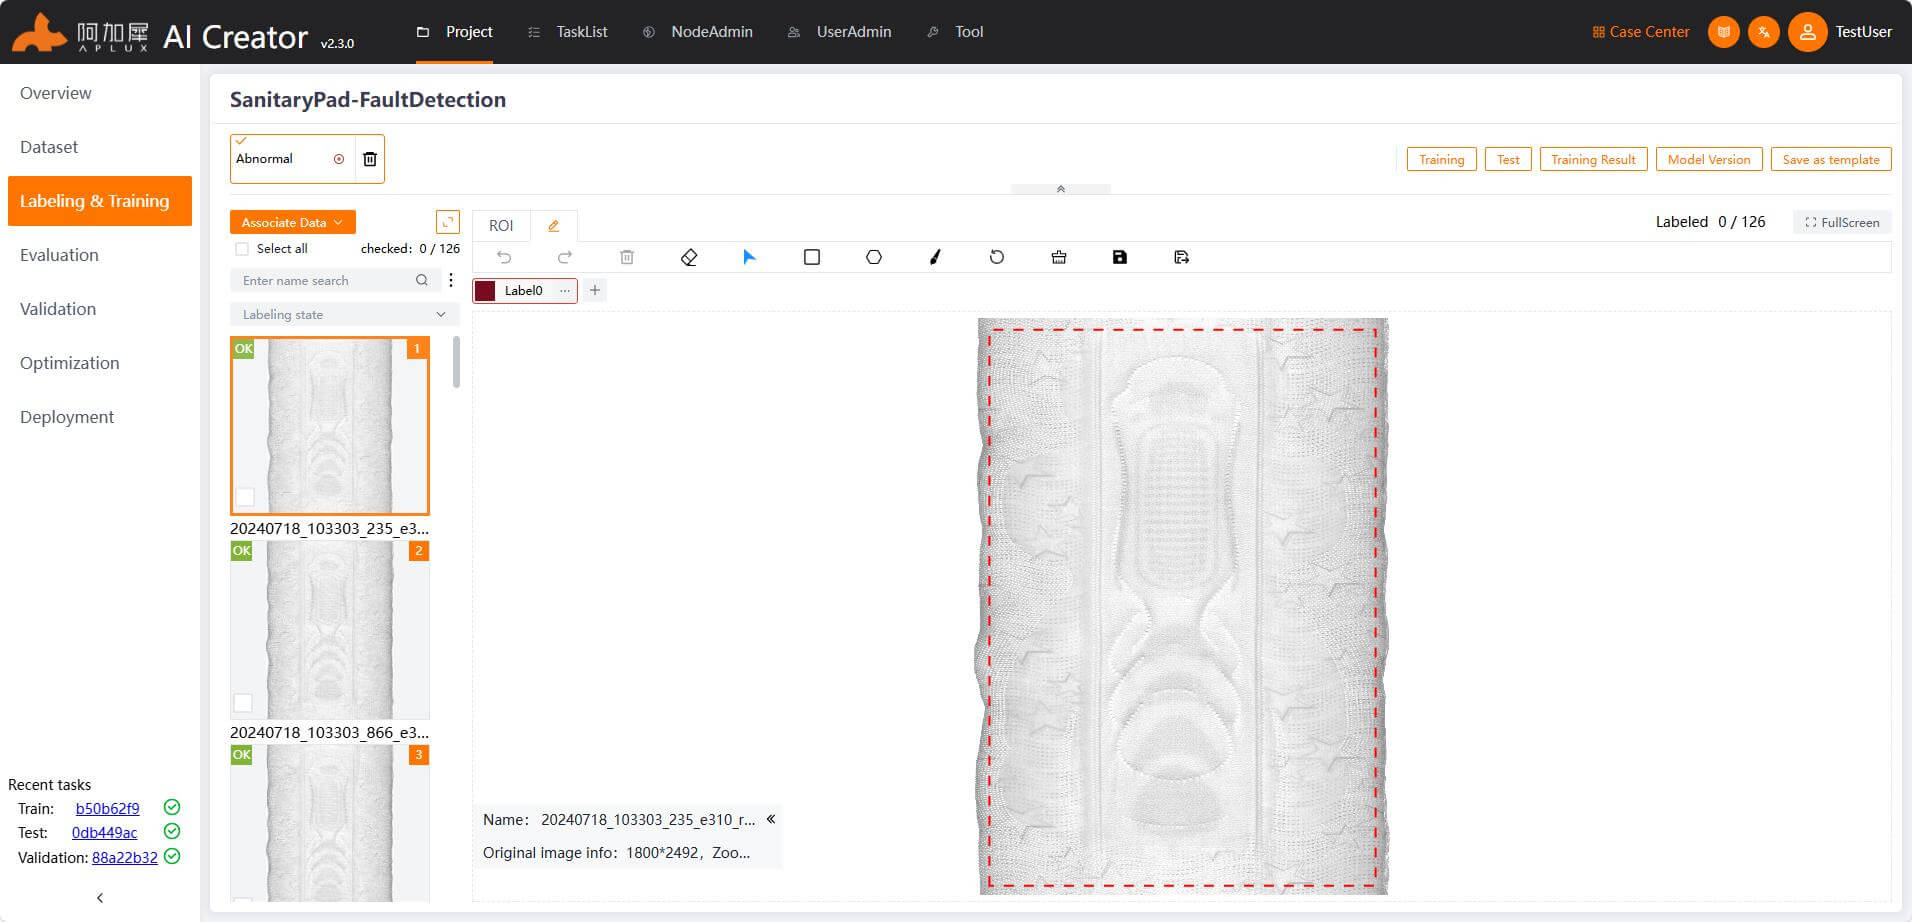
If the training images include defective images (used to assist training), you need to label the defective images. Different algorithm modules provide various annotation tools. The Abnormal module offers rectangle, polygon, and brush tools. Use the brush tool to mark the defects in the images and save them.
TIP
If there are undesired areas for detection around the edges of the images, you can adjust the ROI size accordingly so that the effective image area is within the ROI.
Model Training
- Click the "Training Model" button at the top-right corner of the page to enter the model training parameter settings.
- Set the general parameters and network partitioning. Width, height, network partition X-axis, Y-axis: These 4 parameters should be determined based on the actual situation. Width and height refer to the size of the input image for the model, and the relationship between the training image's width/height, network partition, and input image size must satisfy the following formula: Width * (X-axis value) = Training image width Height * (Y-axis value) = Training image height. Training iterations: Set according to your needs, such as 500 times. Other parameters: Use default values.
- Use default values in the model architecture.
- Set the training set ratio to 80% in "Dataset Partition".
- For the first training, choose "Retrain" in the "Training Mode". For training based on the previous model, select "Add Sample Training" in the "Training Mode".
- Set the pixel difference threshold, with a default value of 15.
- Set filtering parameters, choose labels, and set the effective area or length/width range for the defects.
- After setting the parameters, click the "Start training" button.
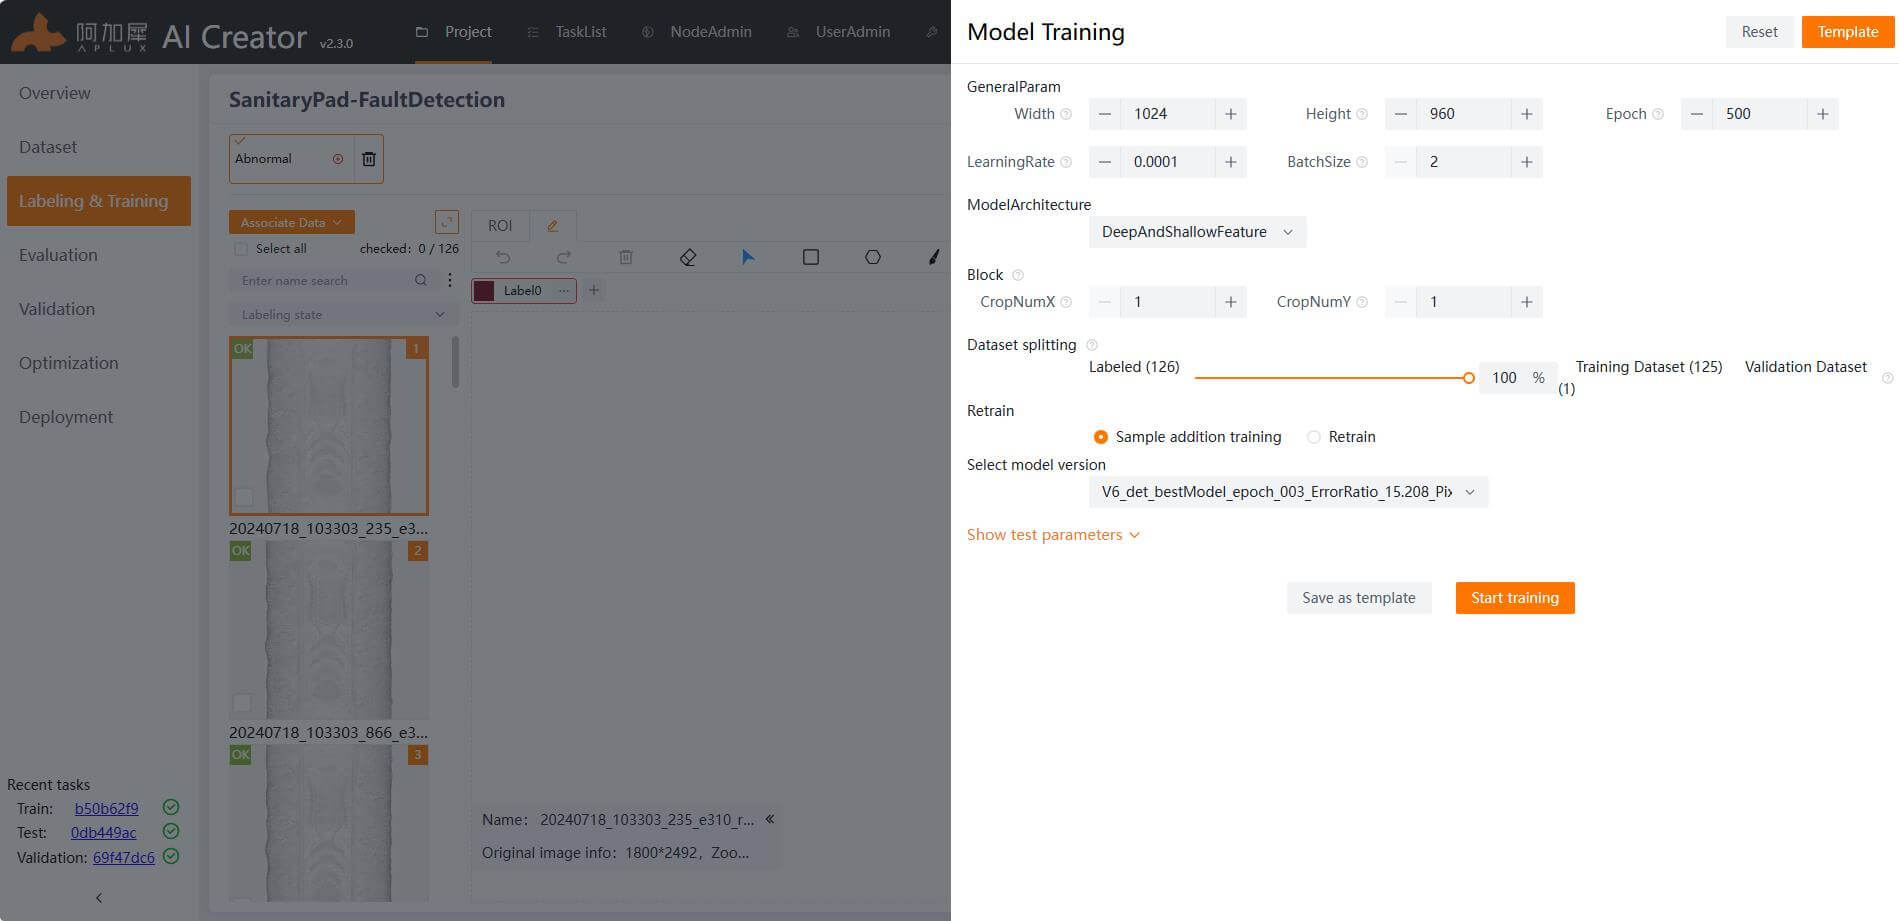
TIP
For detailed explanations of specific parameters, hover the mouse over the help icon next to the parameters.
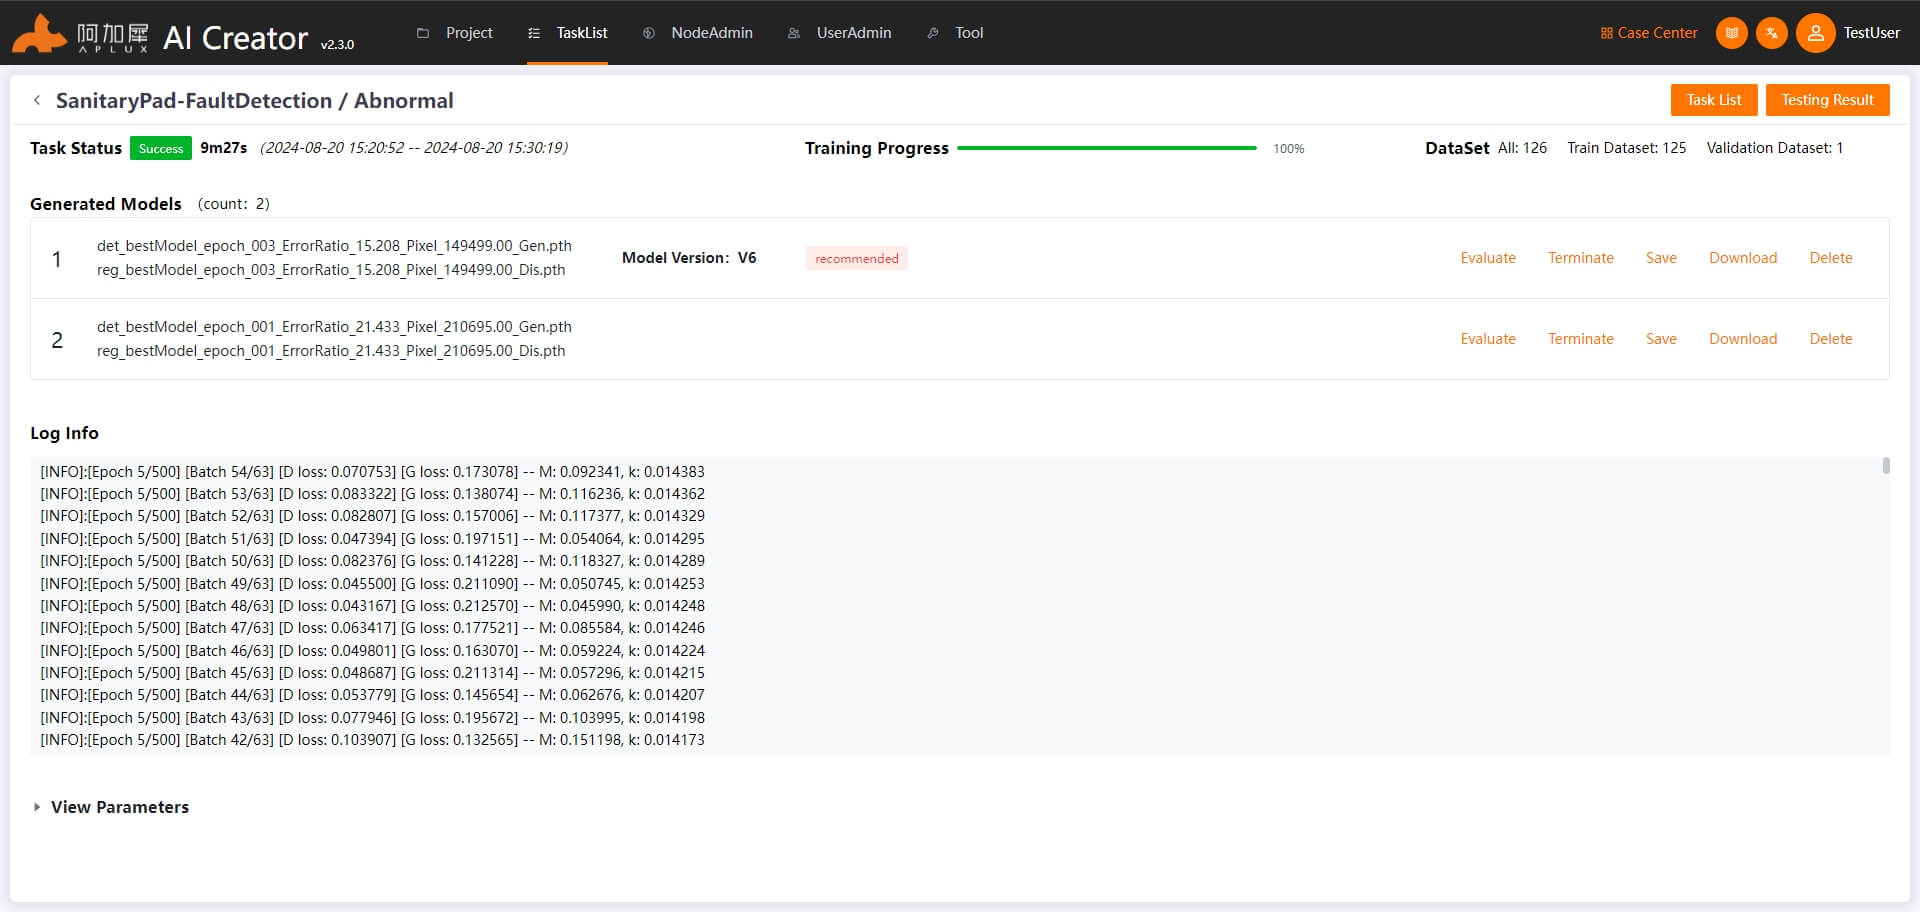
Training Process
Once the training starts, the page will automatically enter the training details view. You can monitor the real-time training logs here, such as the current epoch, as well as real-time information like Batch, D loss, G loss, etc.

Training Completion
AI Creator will automatically evaluate and save multiple trained models. Once training is completed, the system will select the best model and archive it as a version. It will also automatically perform a model evaluation based on this model.
Model Evaluation
After the model training is completed, the system will automatically select the best model for evaluation and calculate the metrics to assess the model's performance.
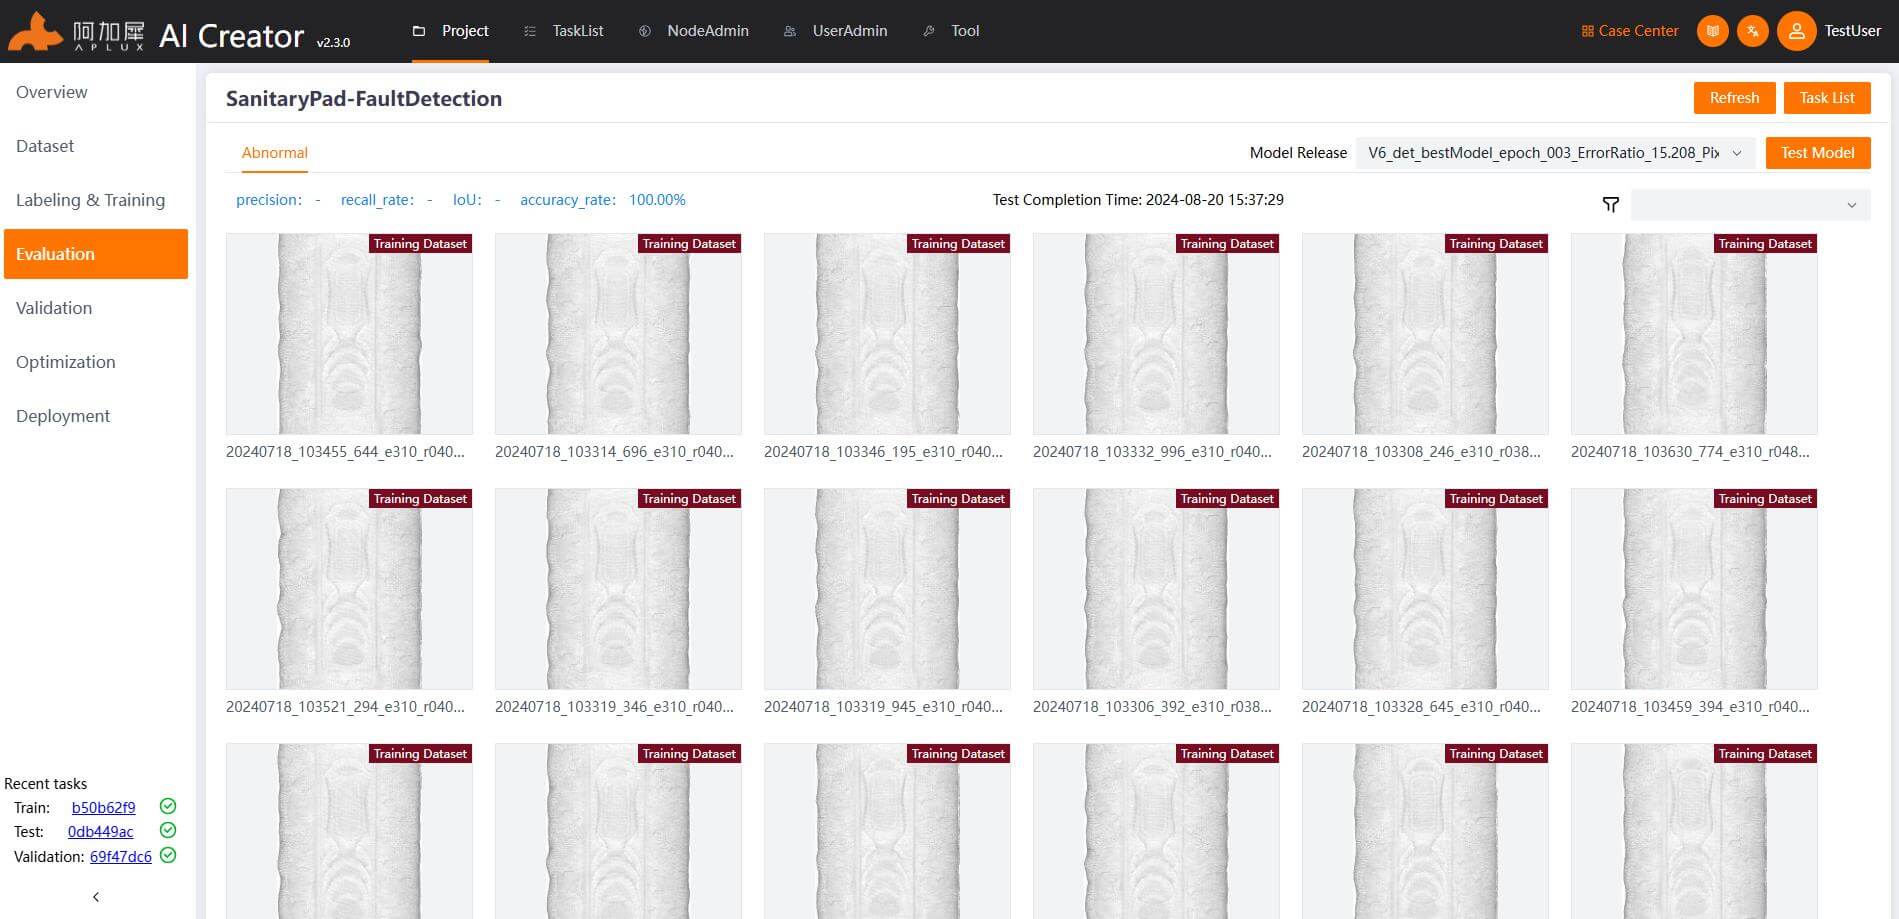
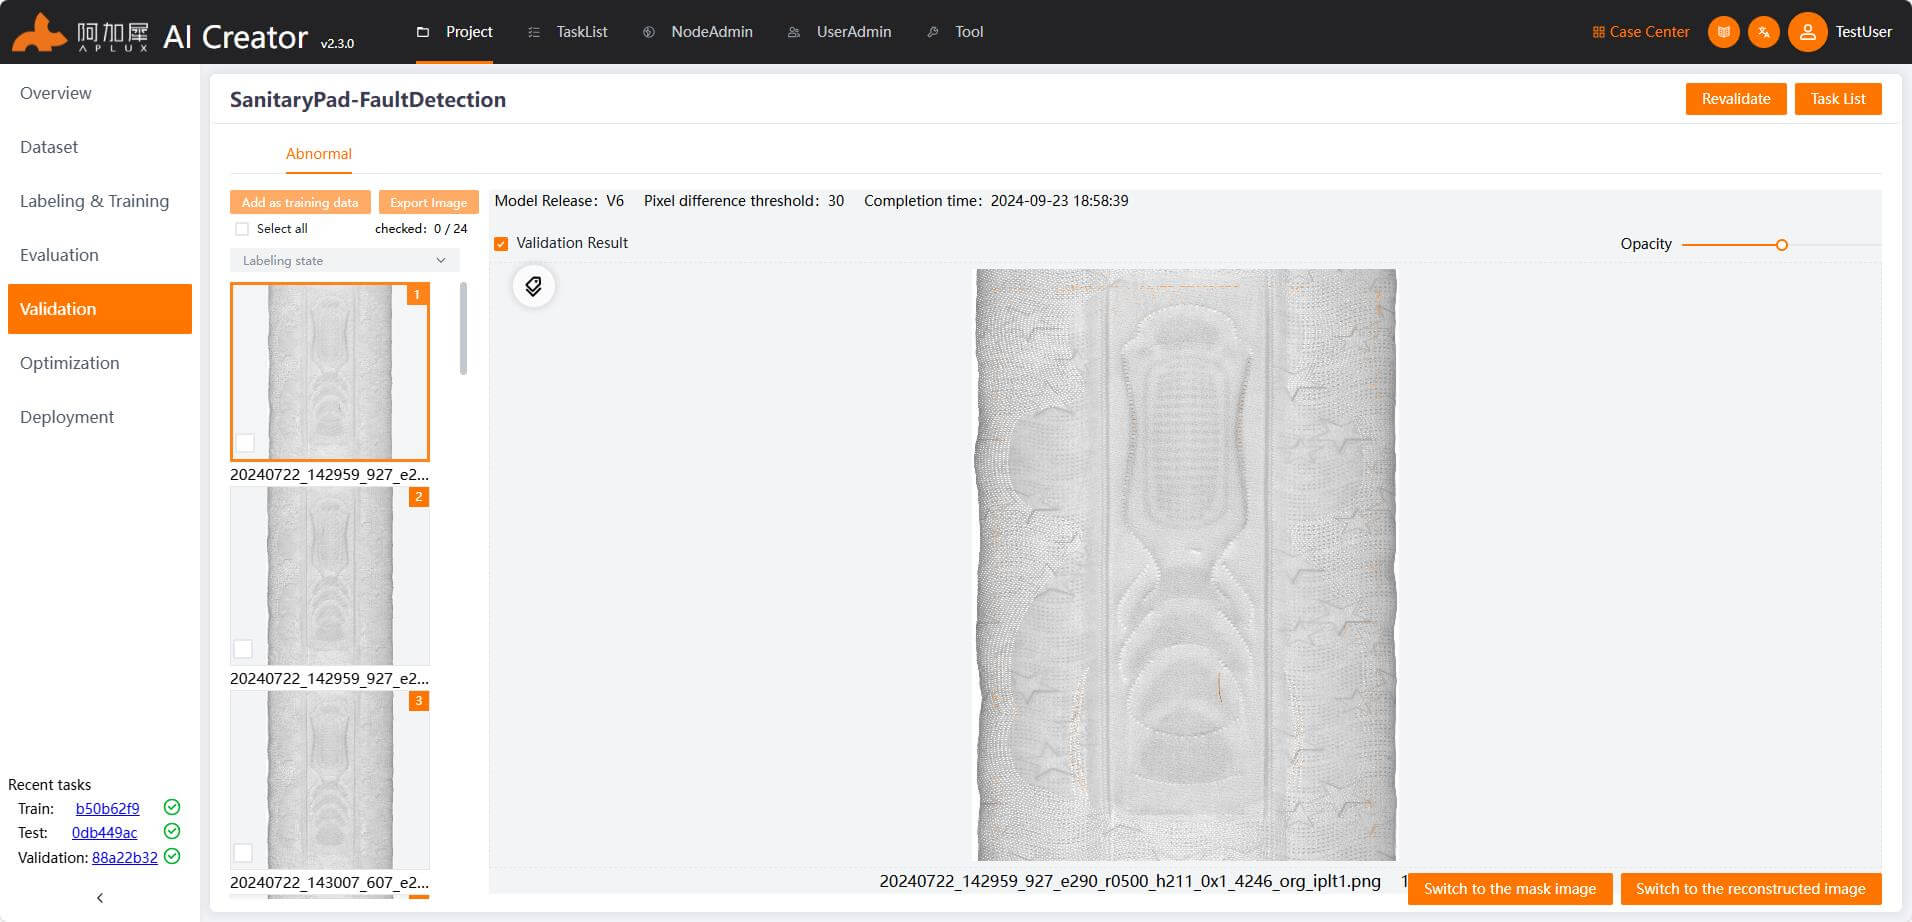
AI Creator supports model evaluation on the training images and displays the results. By default, it shows the result image. You can also switch to view the MASK image (click "Switch to the mask image") or the reconstruction image (click "Switch to the reconstructed image").
If the model evaluation does not meet expectations, iterate through the following steps until the desired outcome is achieved:
- Train with additional Defect-Free Images: Select "Add Sample Training" and retrain.
- Auxiliary Training by adding Defective Images: Add more defective images, label the defects, select "Add Sample Training", and retrain.
- Training by adding More Defect-Free and Defective Images: Add Defect-Free Images, add defective images and label the defects, select "Add Sample Training", and retrain.
Model Validation
Once the model evaluation meets expectations, use the testing set images to independently validate the model's performance.
- In the left-side navigation bar, click "Validation".
- On the model validation page, select the testing set images and click the "Start" button.
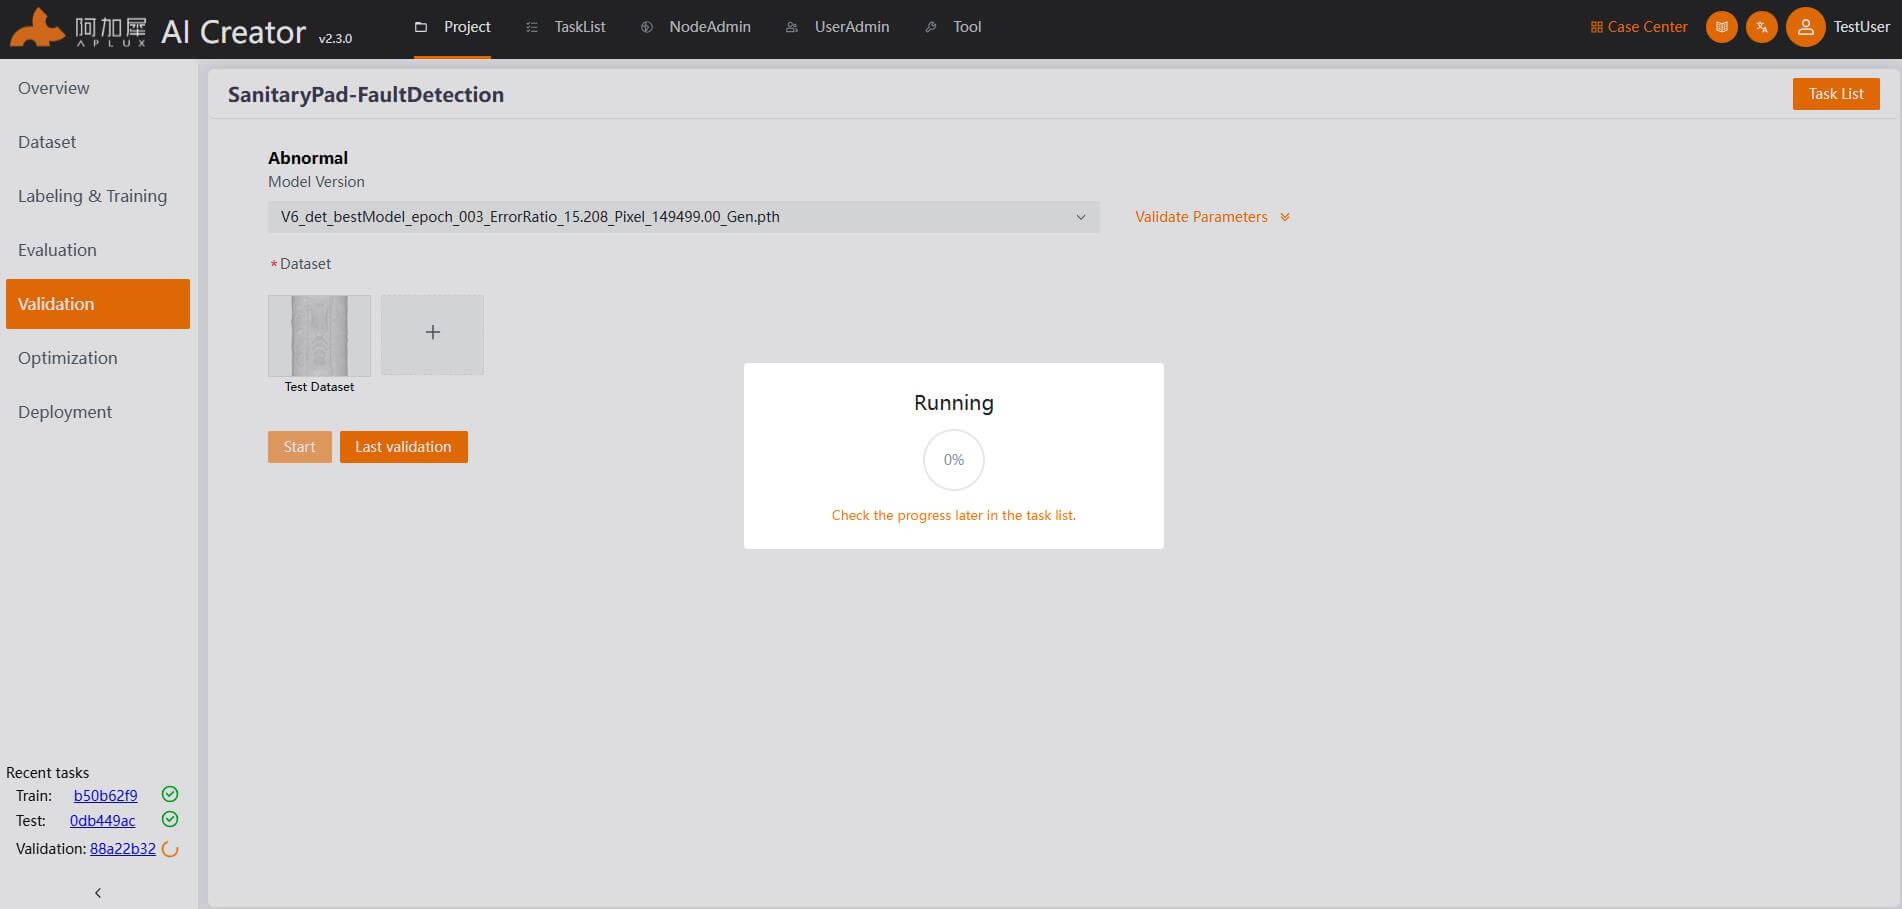
- View validation results. After the validation is completed, the system will automatically enter the validation results page.
Model Optimization
- In the left-side navigation bar, click "Optimization".
- The model must be converted and optimized before it can run on edge devices with ARM architecture, as models trained on x86 platforms need optimization.
AI Creator supports auto optimization and advanced optimization. However, for the abnormal model algorithm, please click on “optimize” button, disable quantization, and select SNPE in target platform. The detailed parameter settings are as follows:

Deployment
In the left-side navigation bar, click "Deployment" to enter the deployment page.
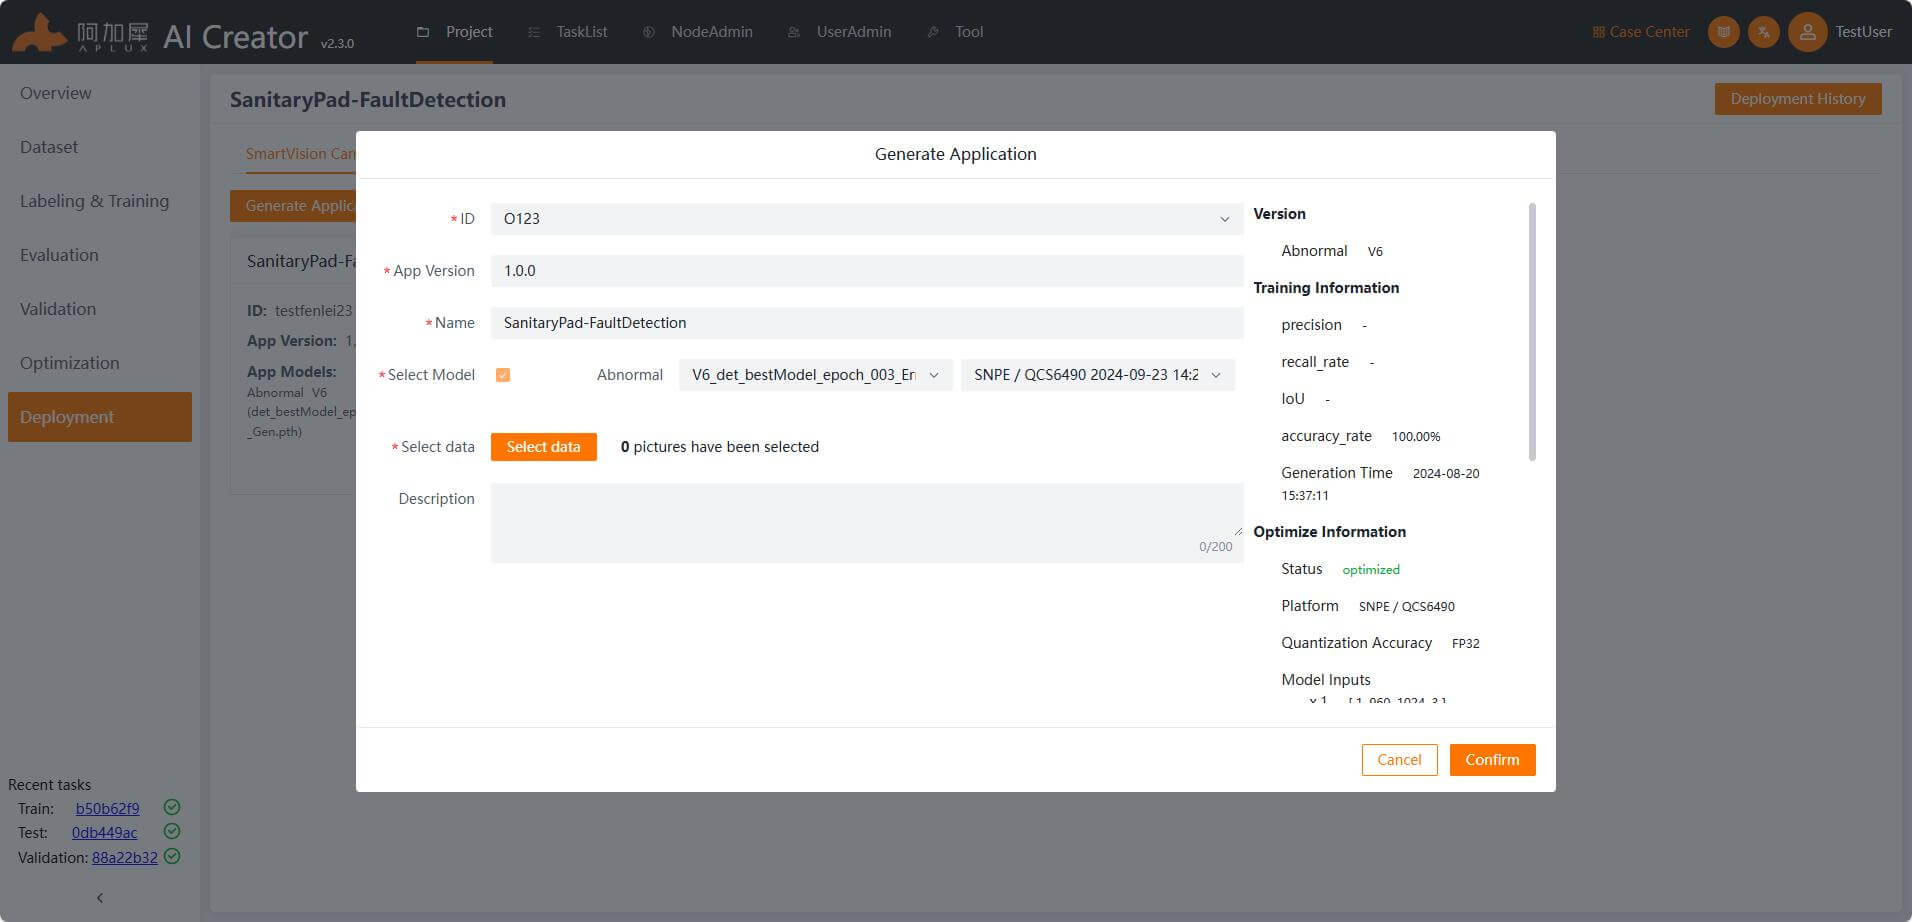
Generate Smart Camera Application
On the deployment page, click the "Generate Application" button. In the pop-up window, enter the application ID, application version number, application name and application description. Select the model version to be deployed and choose the data (static images for smart camera inference). Finally, click the "Confirm" button to generate the smart camera application.
Deploy Application
On the deployment page, click the "Deployment" tab to enter the application deployment page.
Node Integration
Before deploying the model or application, you need to integrate the device node to be deployed.
- Click the "NodeAdmin" tab at the top of the page to enter the node management page.
- Click the "Integrate Node" button, and a node integration pop-up window will appear.
- In pop-up Integration window, select IP Integration and check the Smart Camera under Node Type. In the node type parameters, select "Smart Camera", enter the node name and node IP, and click "OK".
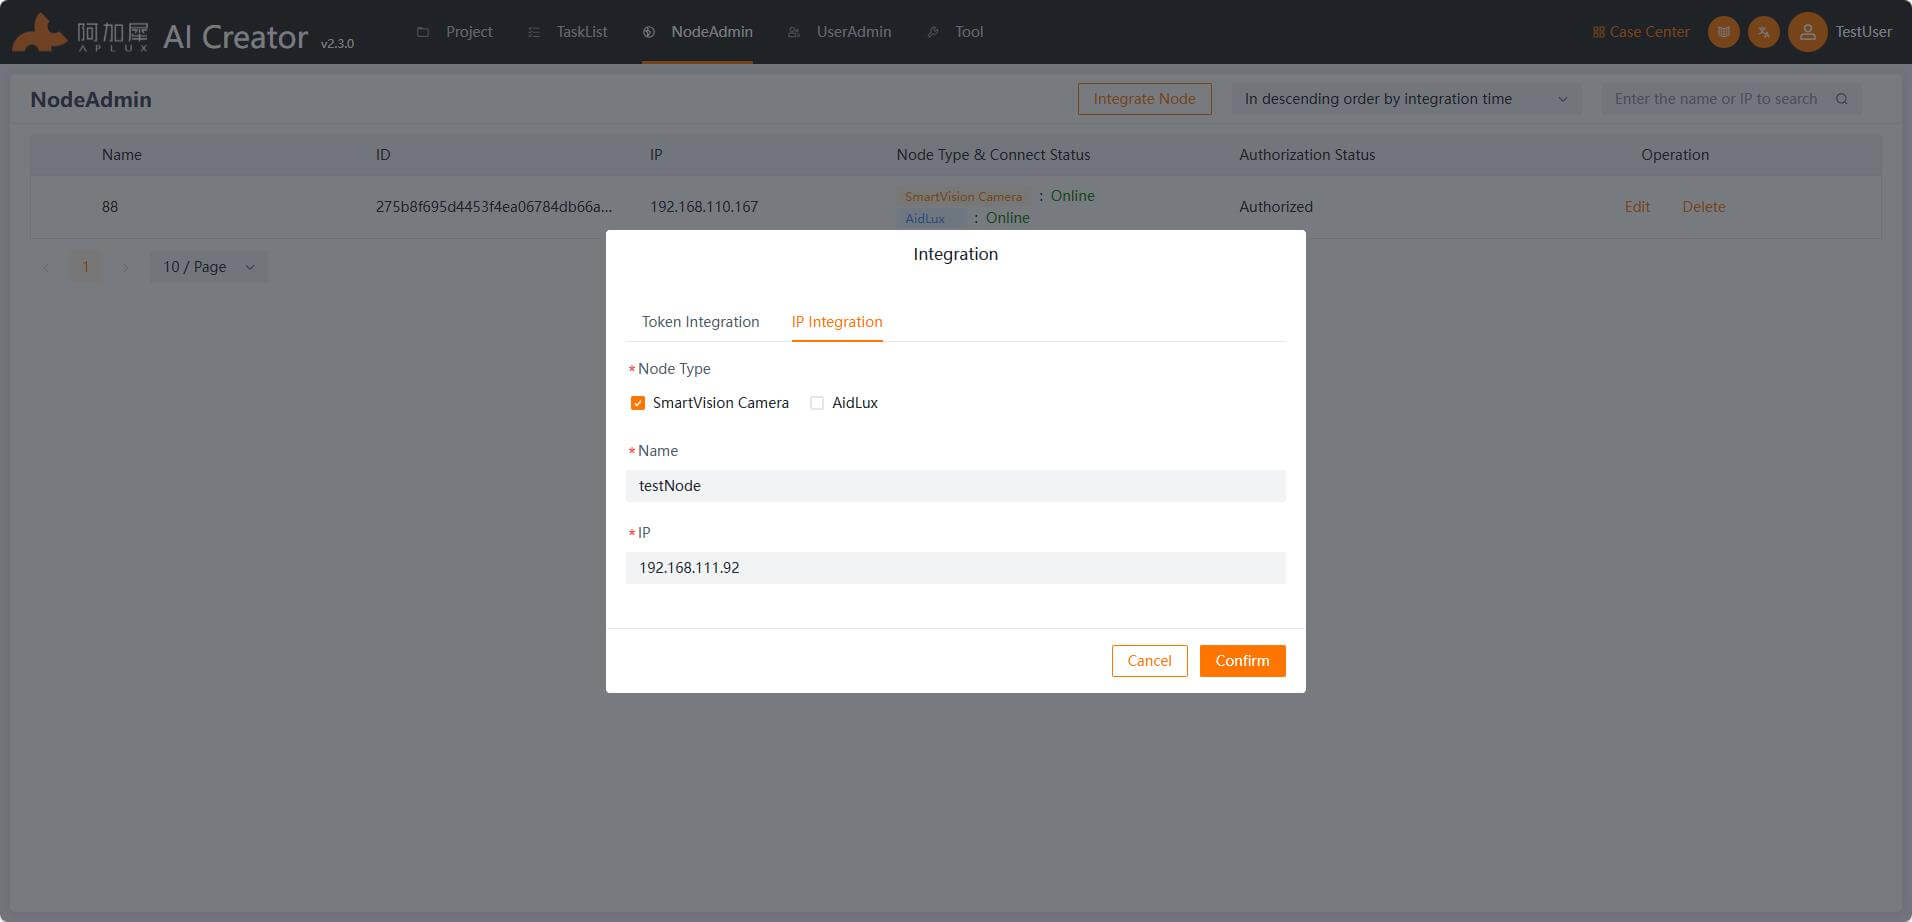
Once the device is integrated, the "Node Type & Connection Status" will show "Smart Camera: Online".
Return to the Project Deployment Page
Click "Project", and in the action list of the current project, click "Enter" -> "Deployment" to enter the main deployment page.
Deploy Smart Camera Application
On the deployment page, click the "Deployment" tab, and in the action list of the created smart camera node, click "Deploy Application" -> "Deploy".

Verify the Deployed Application
Once AI Creator indicates that the deployment is complete, run the deployed application on the smart camera node and check the results.
TIP
This section is not part of AI Creator's functionality and is only provided as a next step direction.