Segmentation Detection
Data Preparation
Prepare training set images
- Defective images (required): These can contain multiple defects, where image defects refer to areas or features in the image that do not meet expected standards. These defects can arise from various causes, such as production errors, equipment failures, material issues, etc. In the context of image segmentation tasks, defects usually refer to abnormal areas that need detection and annotation. Common defect types include cracks, scratches, contaminants, etc.
- Non-defective images (optional): These images do not contain detectable defect areas and can assist in training.
Prepare test set images
- The types of defects appearing in the test set images should all be included in the training set.
Create Project
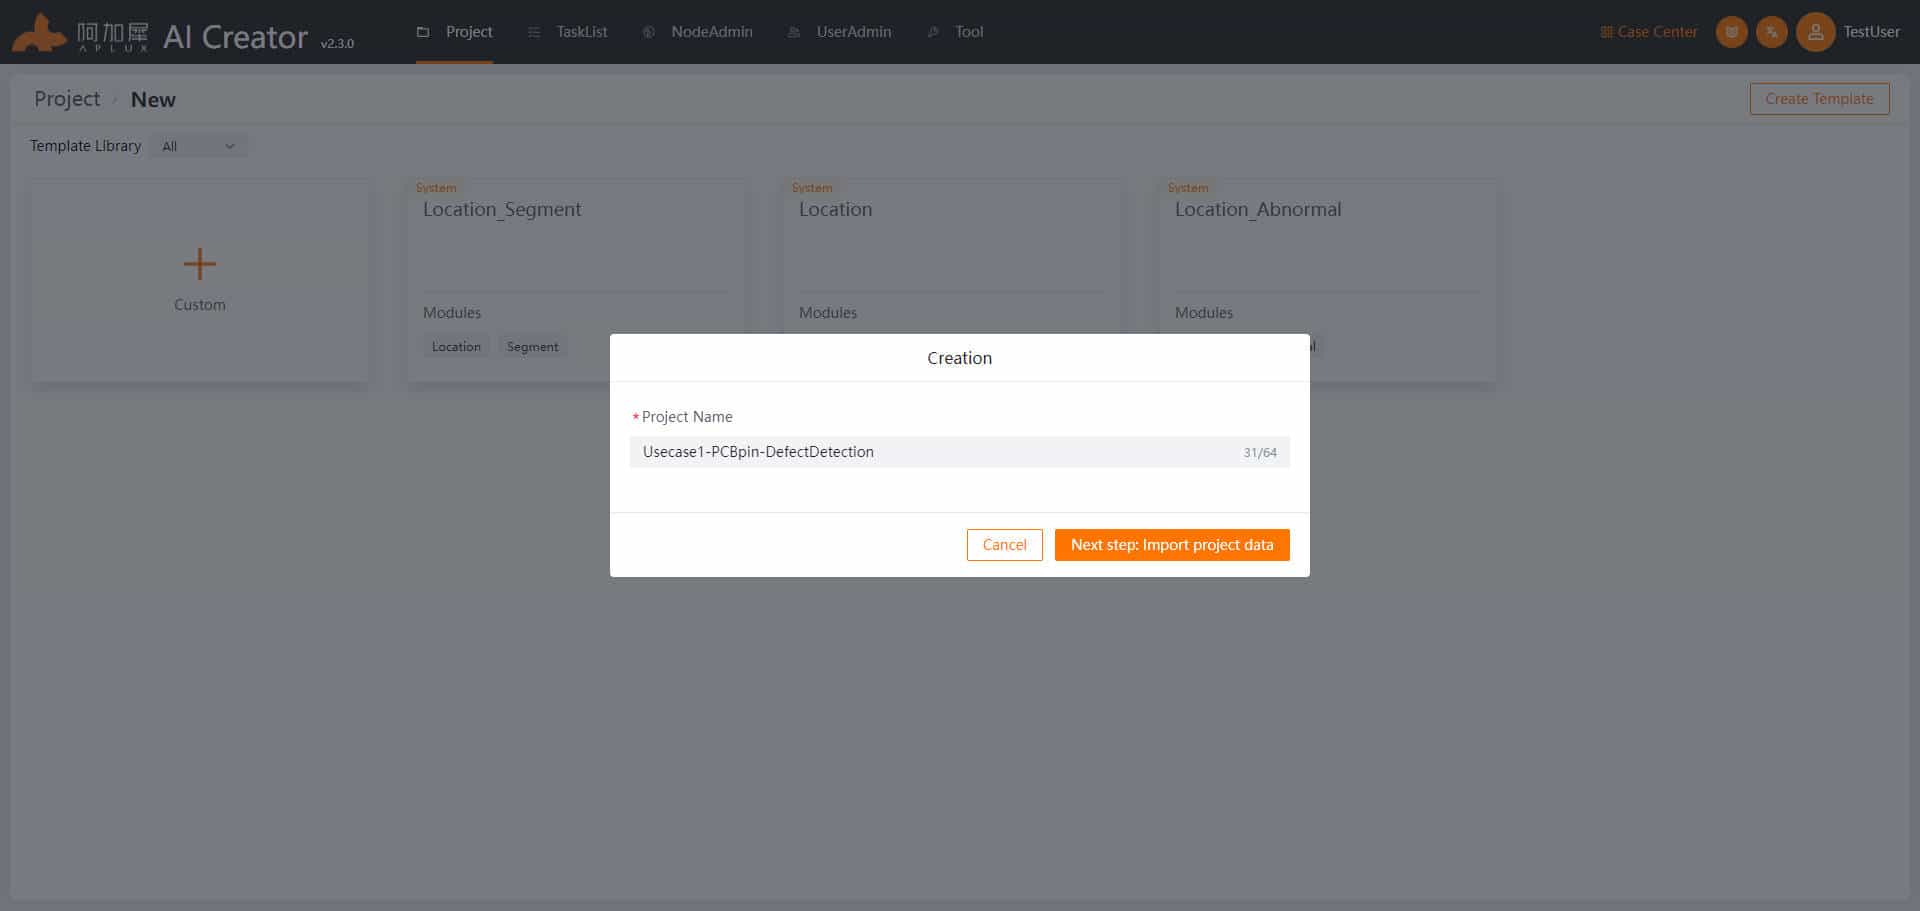
Log in to AI Creator and click the "New" button in the project center.

Click on "Custom Project" enter the project name "Case 1 - PCB Pins - Defect Detection" in the new project popup, and click "Next: Import Project Data" to complete the project creation.
Import Dataset
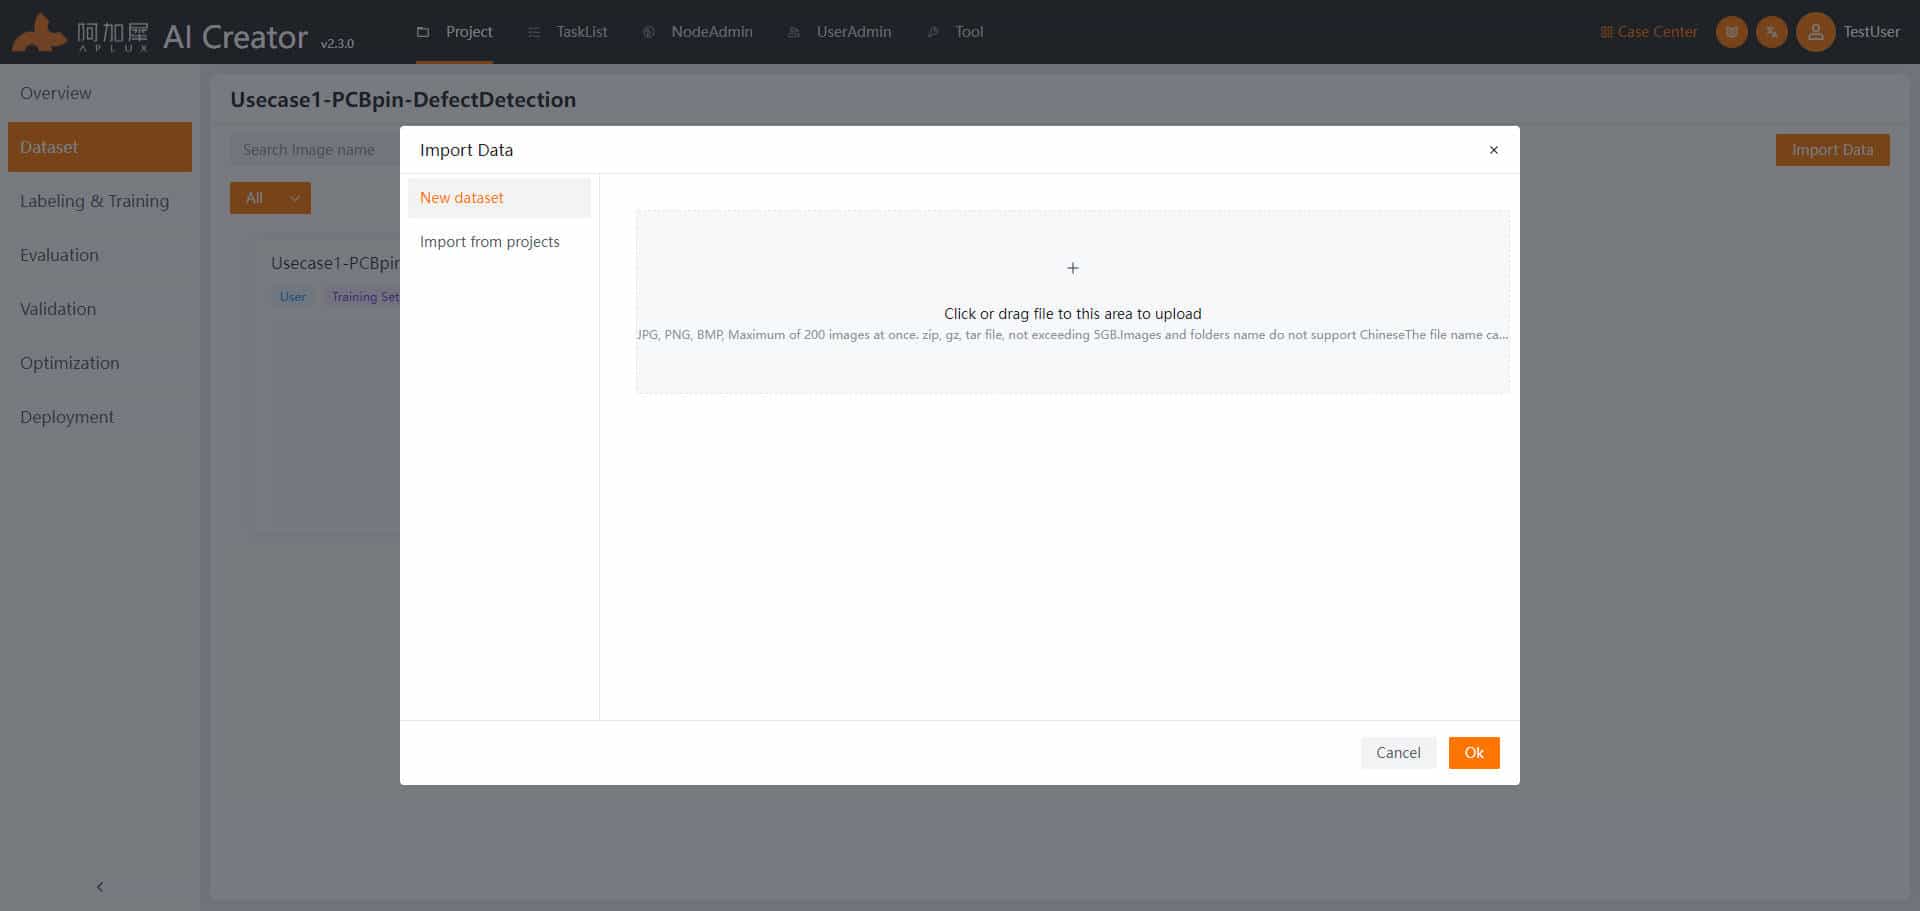
- Click on "Dataset" in the left navigation bar.
- Upload training and test image sets. The project creation will automatically create folders for the dataset and training data. Click into the training or test set. In both sets, click "Import Images" -> "Create Dataset" drag images or compressed files into the upload area, and click "Confirm" to import data.
Add Algorithm Module
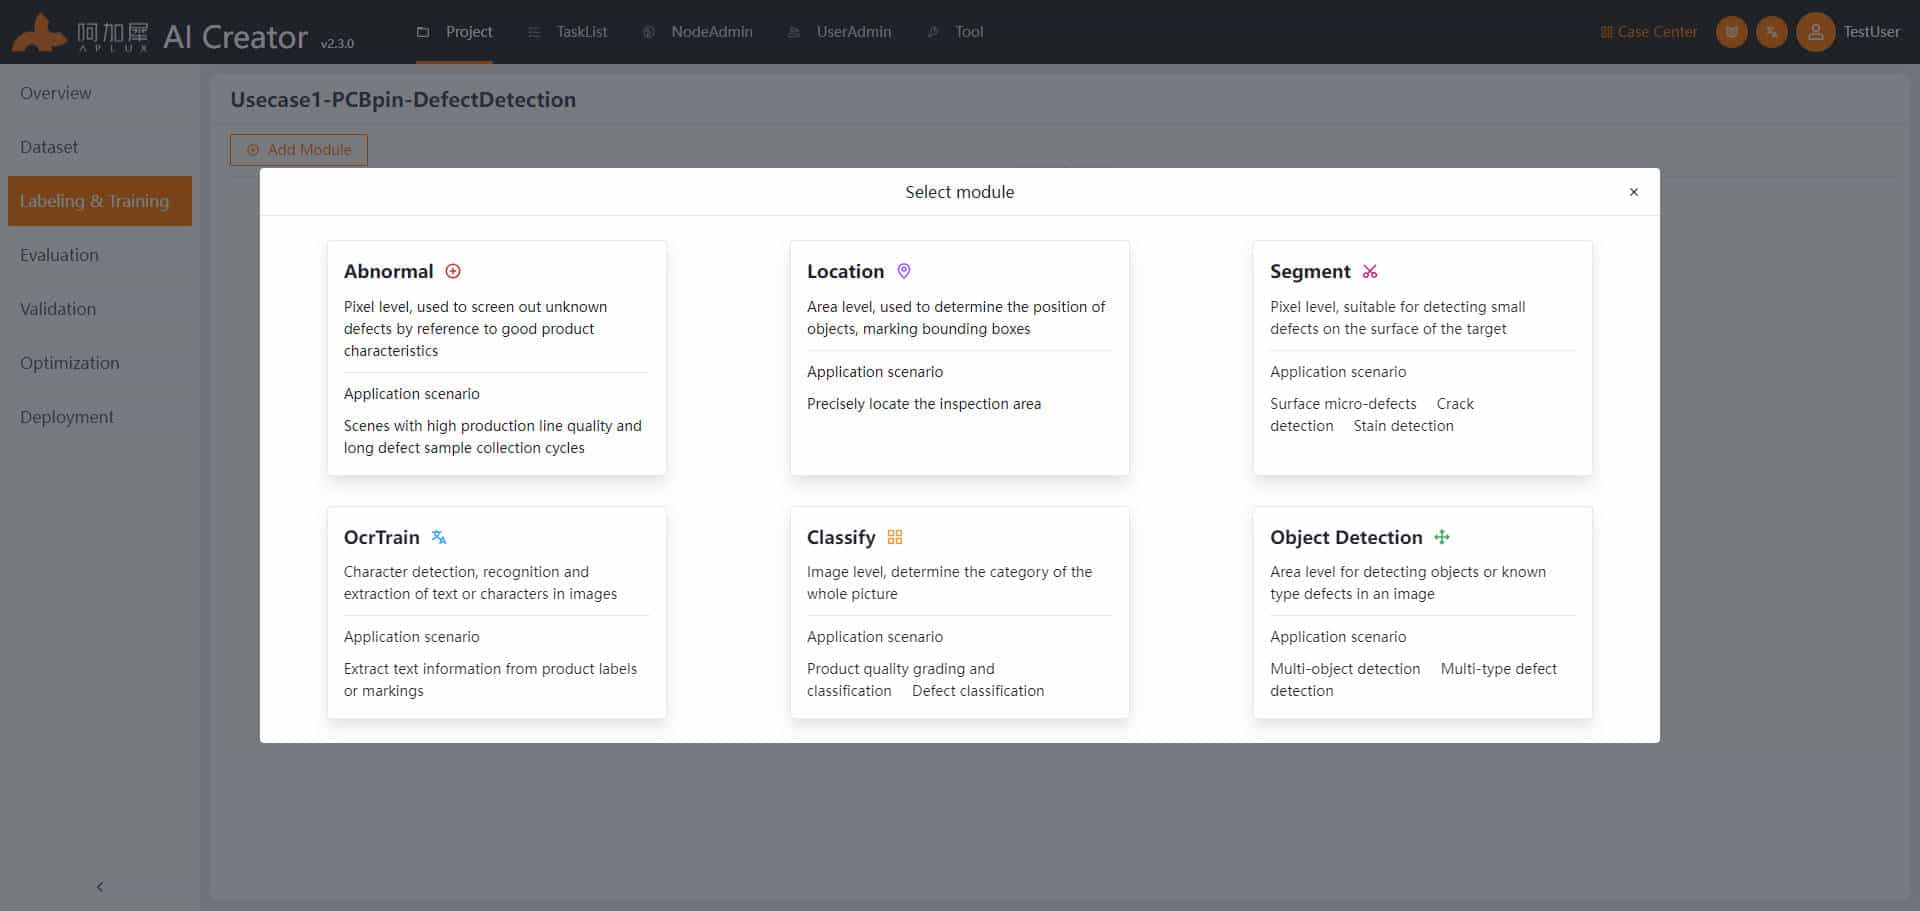
- Click on "Annotation & Training" in the left navigation bar.
- Click "Add Module" and select "Segmentation" in the module selection window.
Associate Images
Click the "Associate Data" dropdown menu, select the "Associate Images" button, choose the training set in the popup window, and finally click "Confirm"

Data Annotation
- Click on "Annotation & Training" in the left navigation bar.
- Annotate data.
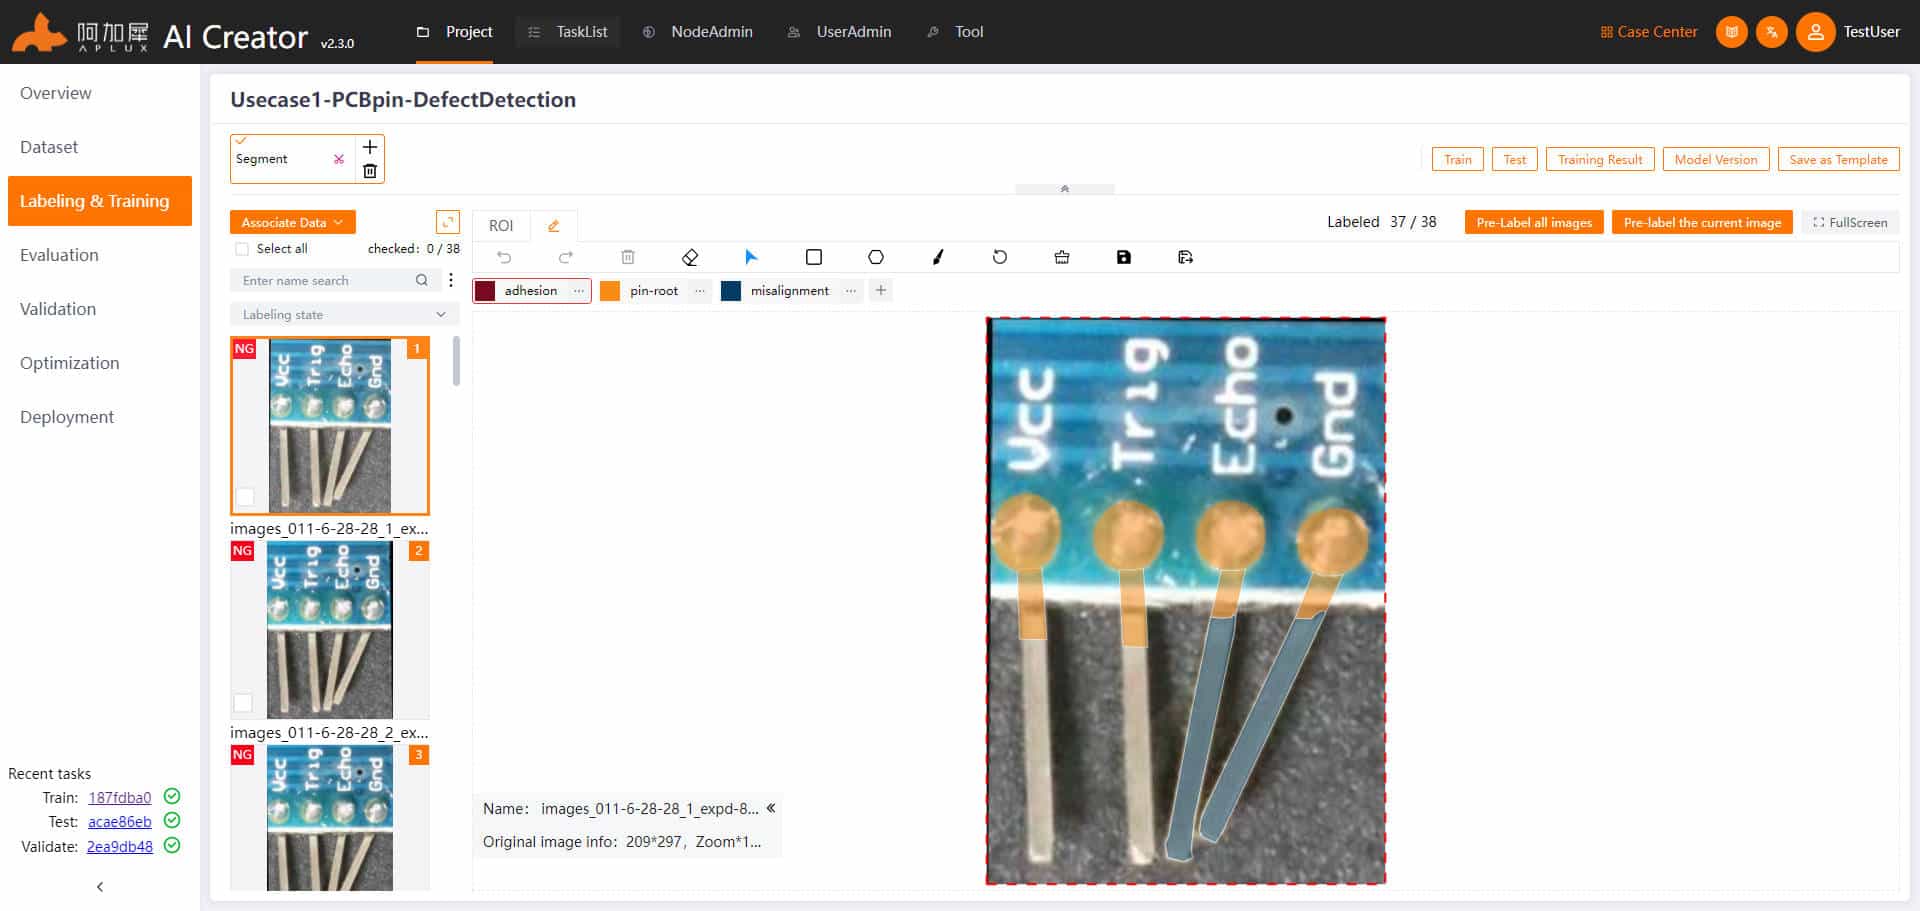
Note: The segmentation algorithm module can detect pixel-level defects. It is recommended to use the brush tool for defect annotation.
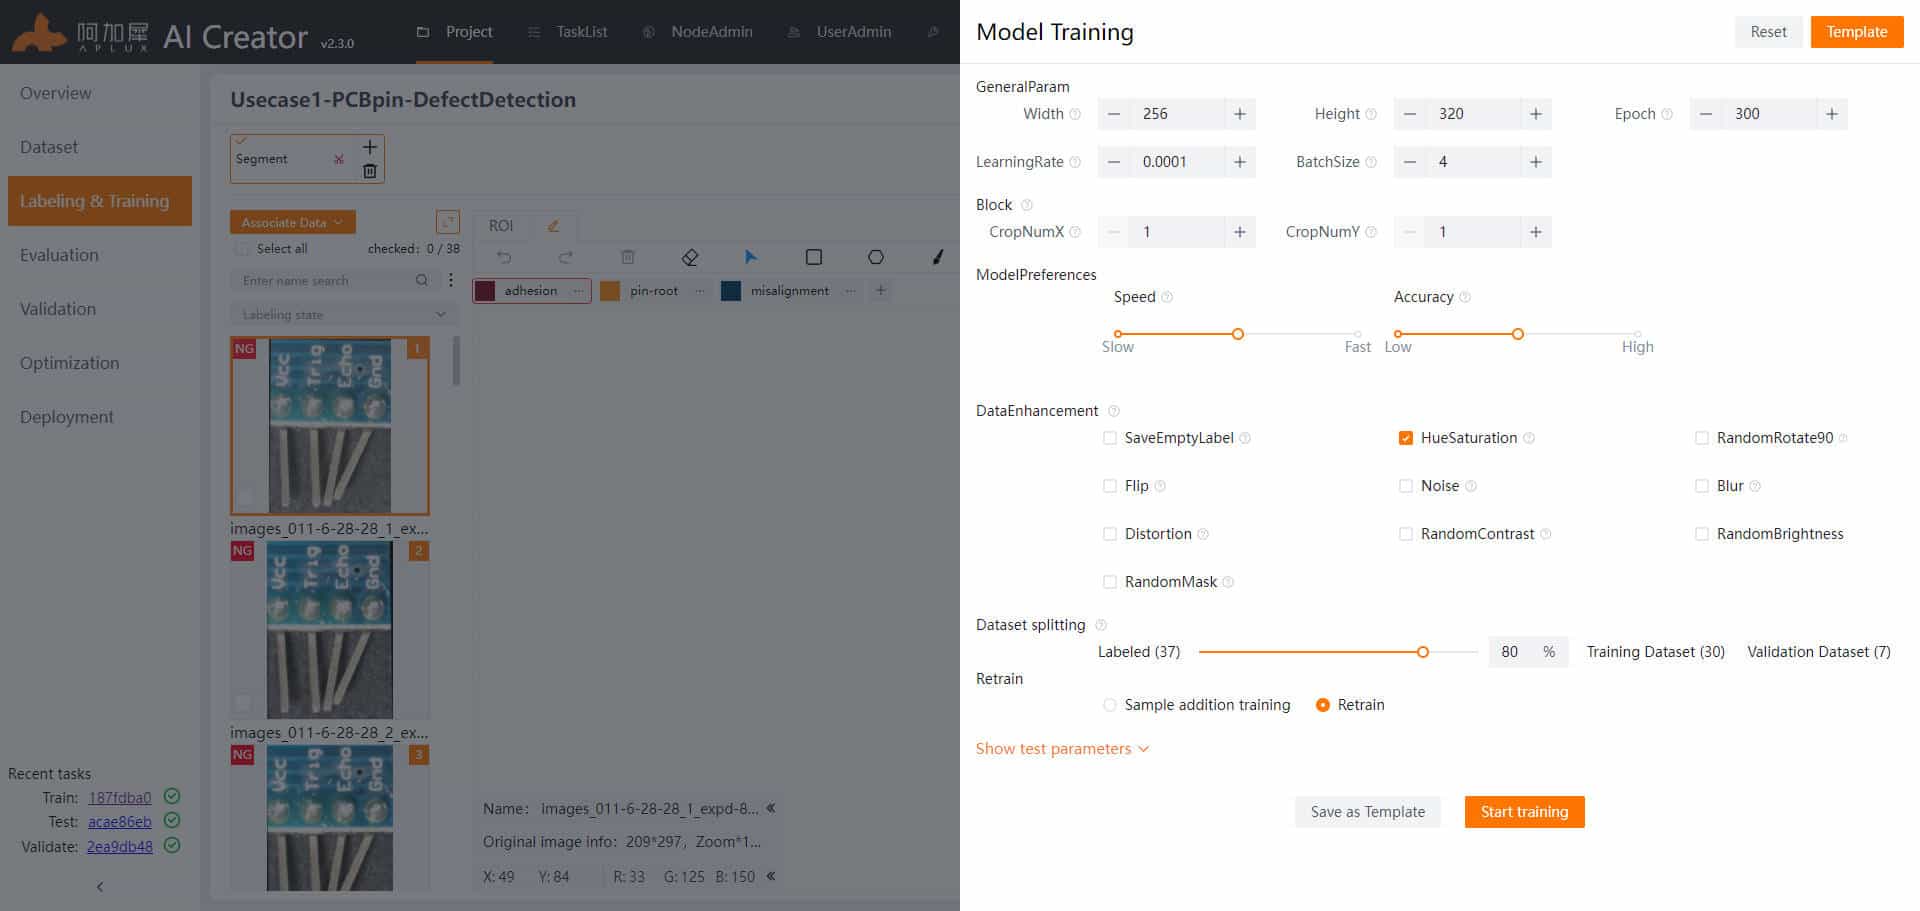
Model Training
- Click the "Train Model" button in the upper right corner to enter model training parameter settings.
- Set general parameters and network segmentation. Width, height, network segmentation X-axis, Y-axis: These four parameters need to be determined based on actual conditions. Width and height refer to the model input image dimensions, and the training image width and height must satisfy the following formulas: Width * (X-axis value) = training image width; Height * (Y-axis value) = training image height; Training epochs: Set according to needs, such as 500 epochs; Other parameters: Use default values.
- Model preference: Choose based on processing scene speed and detection accuracy.
- Data augmentation: Randomly transform training set data through different methods to increase training samples, which can enhance the robustness of the training model.
- In "Split Dataset" it is recommended to set the training set ratio to 90%.
- For the first training, select "Retrain" in the training mode; for subsequent training based on the last model, select "Sample Training"
- Set filtering parameters (optional): Select labels and set the effective area or range of the long and short edges of defects.
- After parameter settings are complete, please click the "Start Training" button.
TIP
For detailed explanations of specific parameters, hover the mouse over the help icon next to the parameter to view.
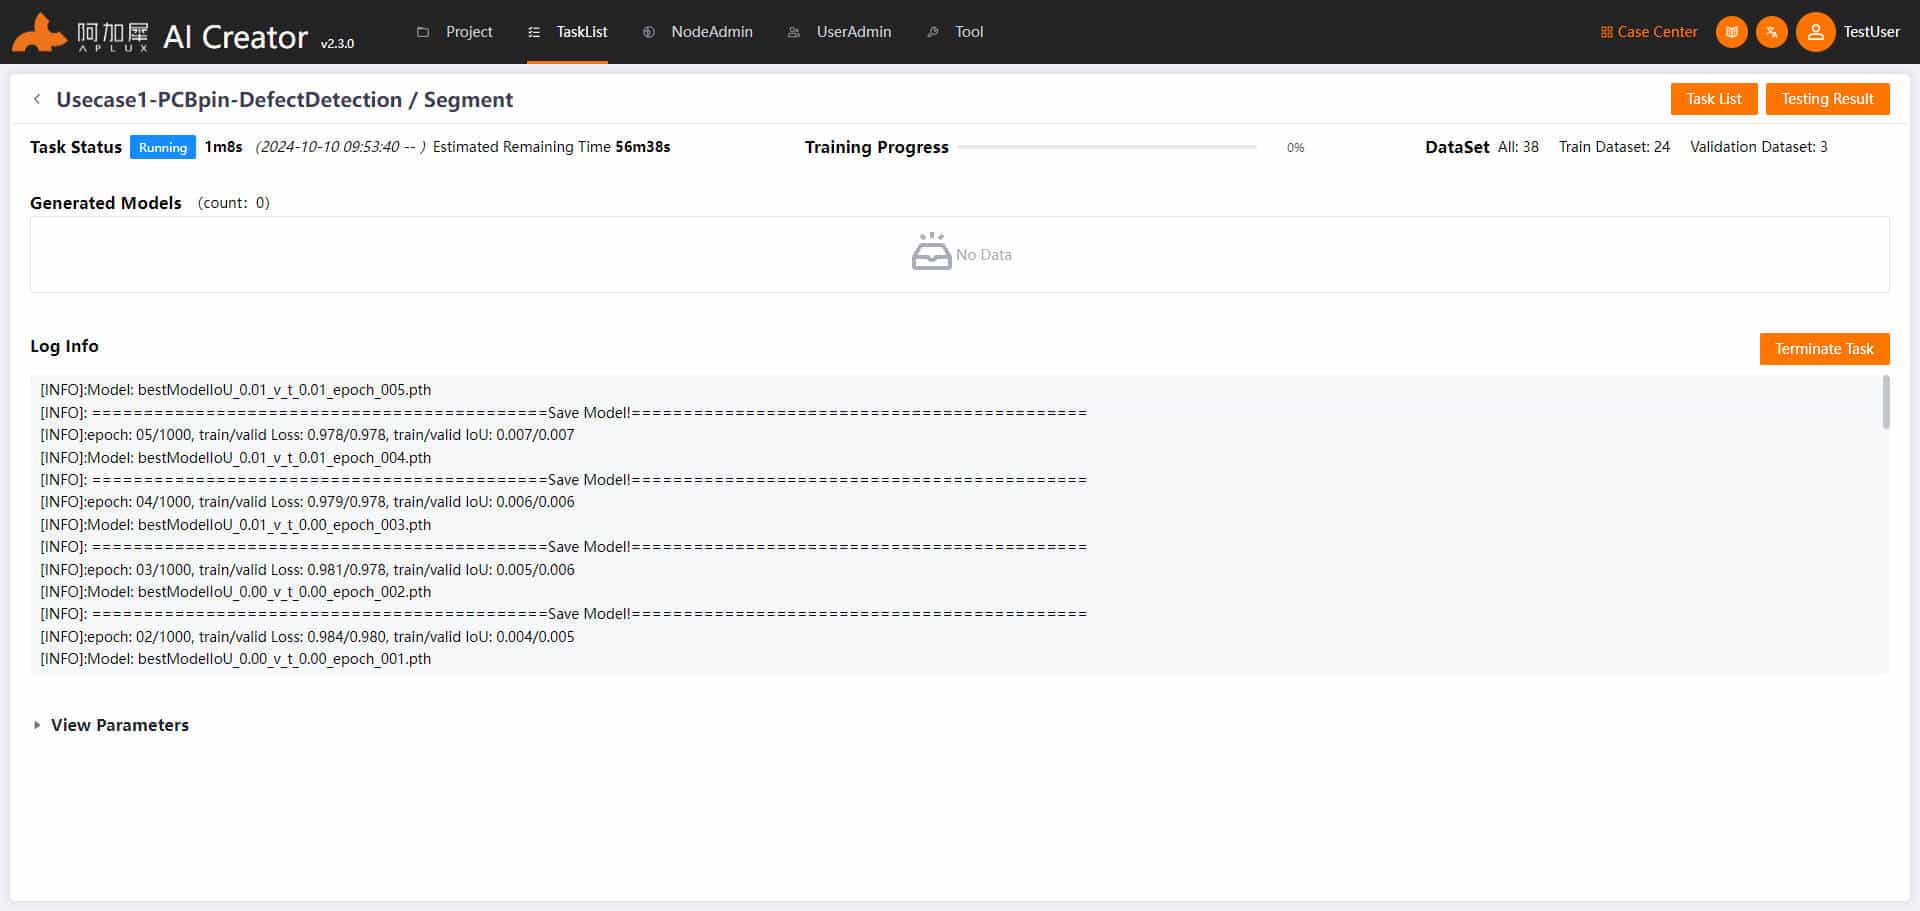
Training Process
Once training starts, the page will automatically enter the training details page, where you can view real-time logs of the training, such as the current epoch and also see information like loss and IoU in real-time.
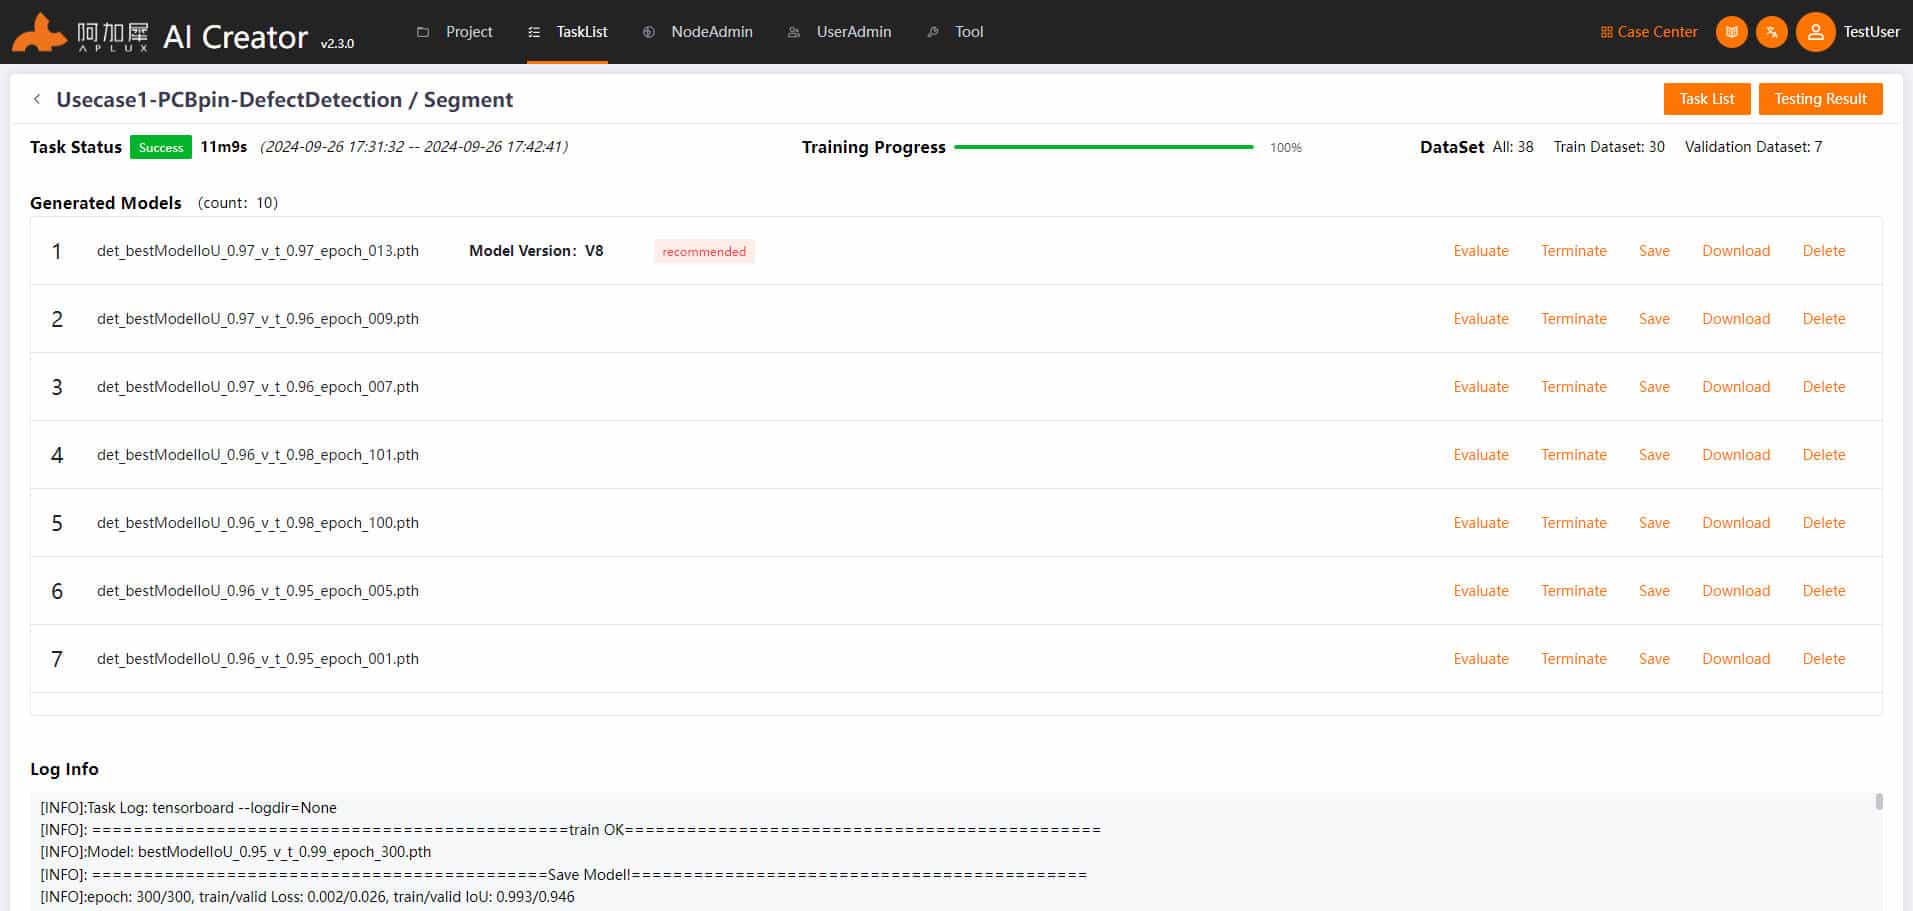
Training Completion
AI Creator will automatically evaluate and save multiple training models. After training is complete, the system will select the model with the best numerical performance as a version and will automatically perform a model evaluation based on that model.
Model Evaluation
After model training is complete, the system will automatically select the optimal model for evaluation and calculate metrics to measure model performance.
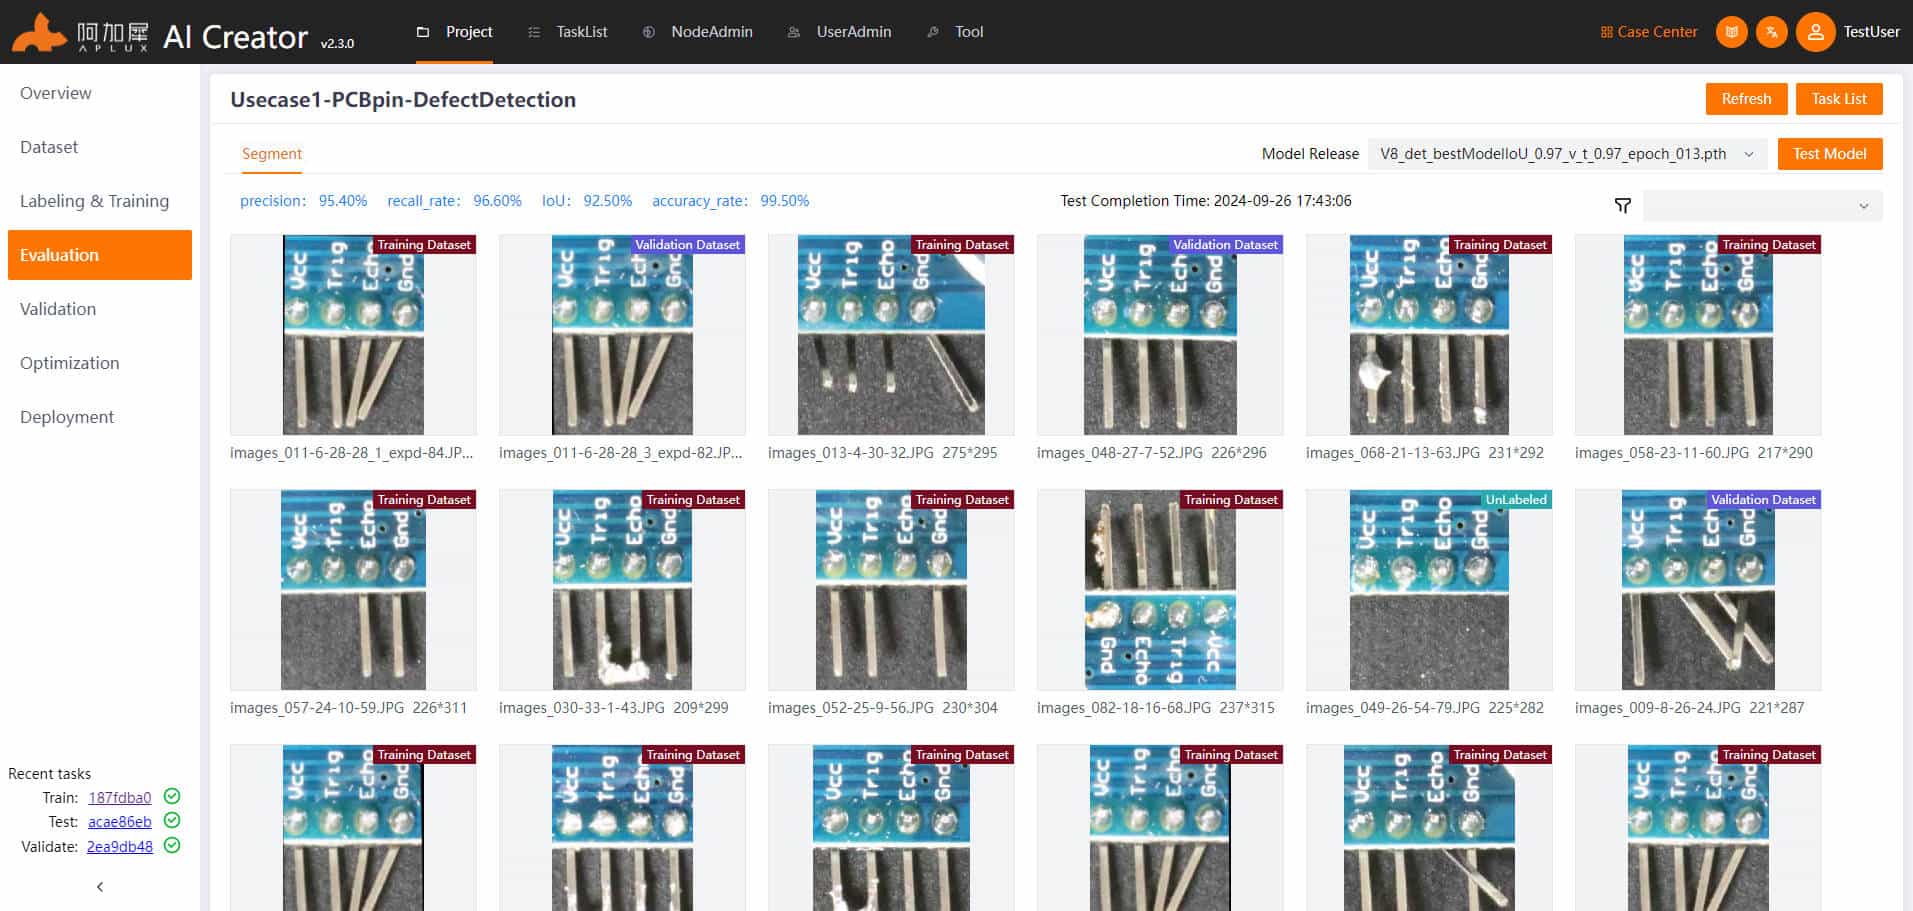
AI Creator supports model evaluation on training images and displays the results. The default display shows the result image along with annotation information and training detection results.
If the model evaluation does not meet expectations, you can conduct sample training based on existing defect images or increase training samples and annotate them, until the expected results are fully achieved.
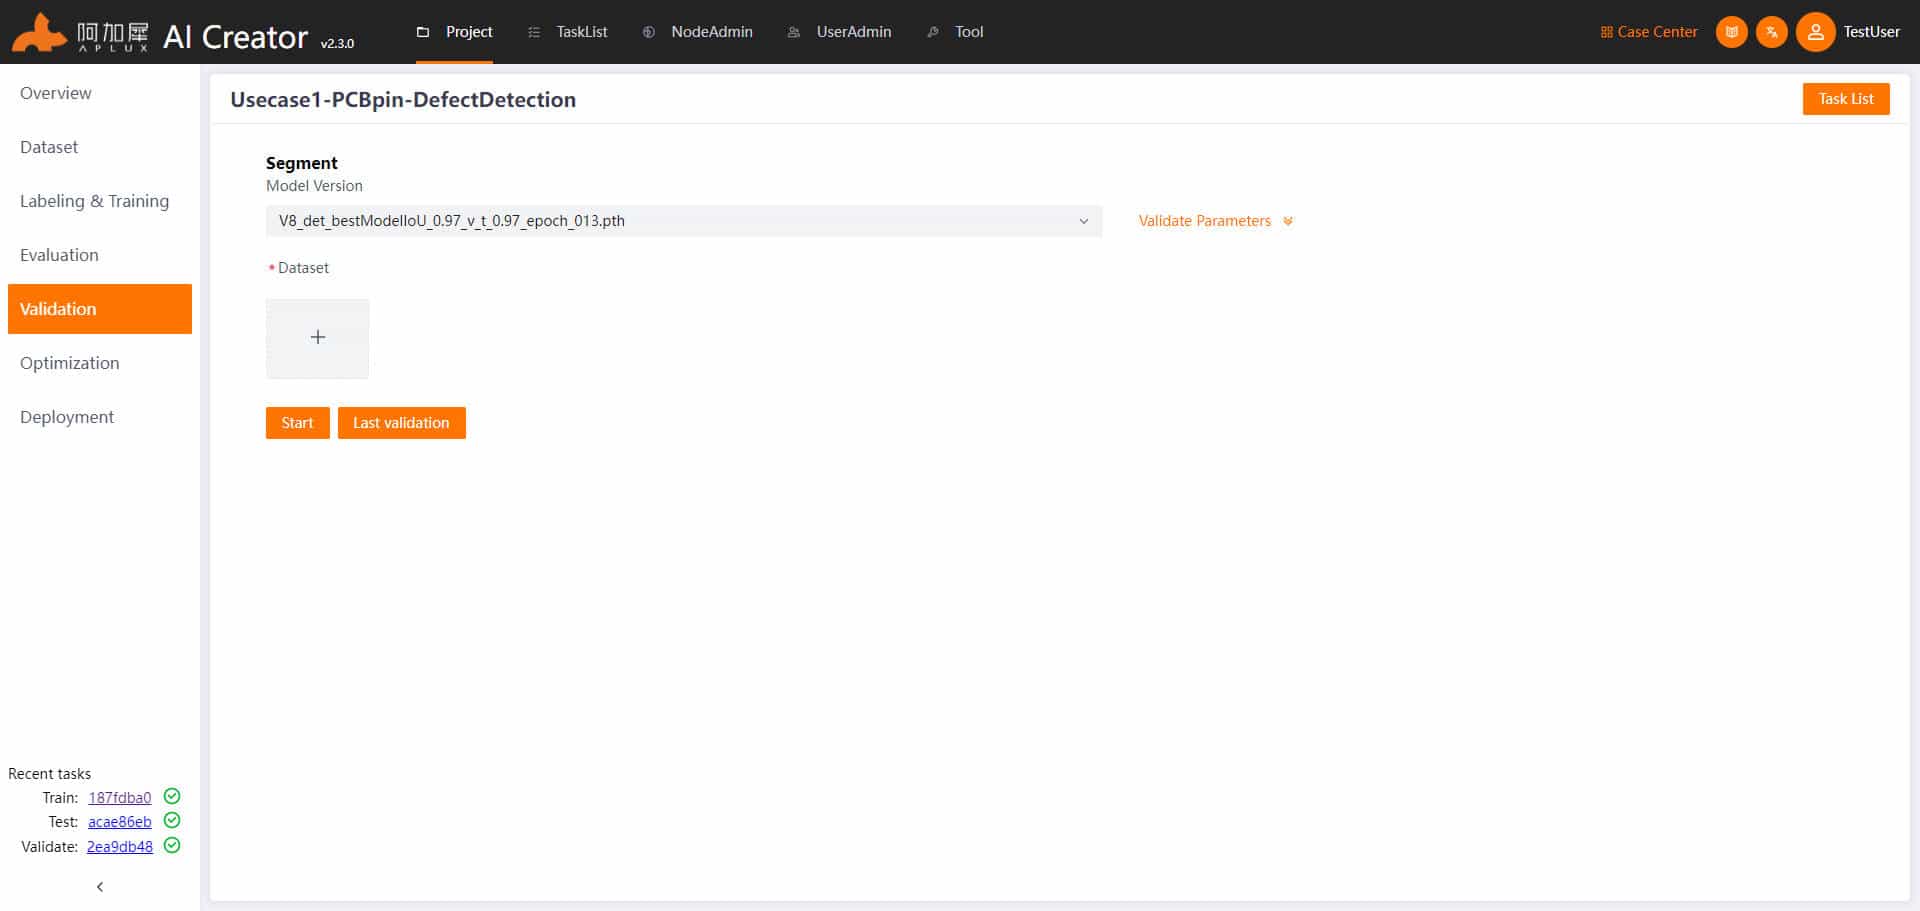
Model Validation
Once model evaluation meets expectations, use test set images to independently validate the training model's performance.
Click on "Project Validation" in the left navigation bar.
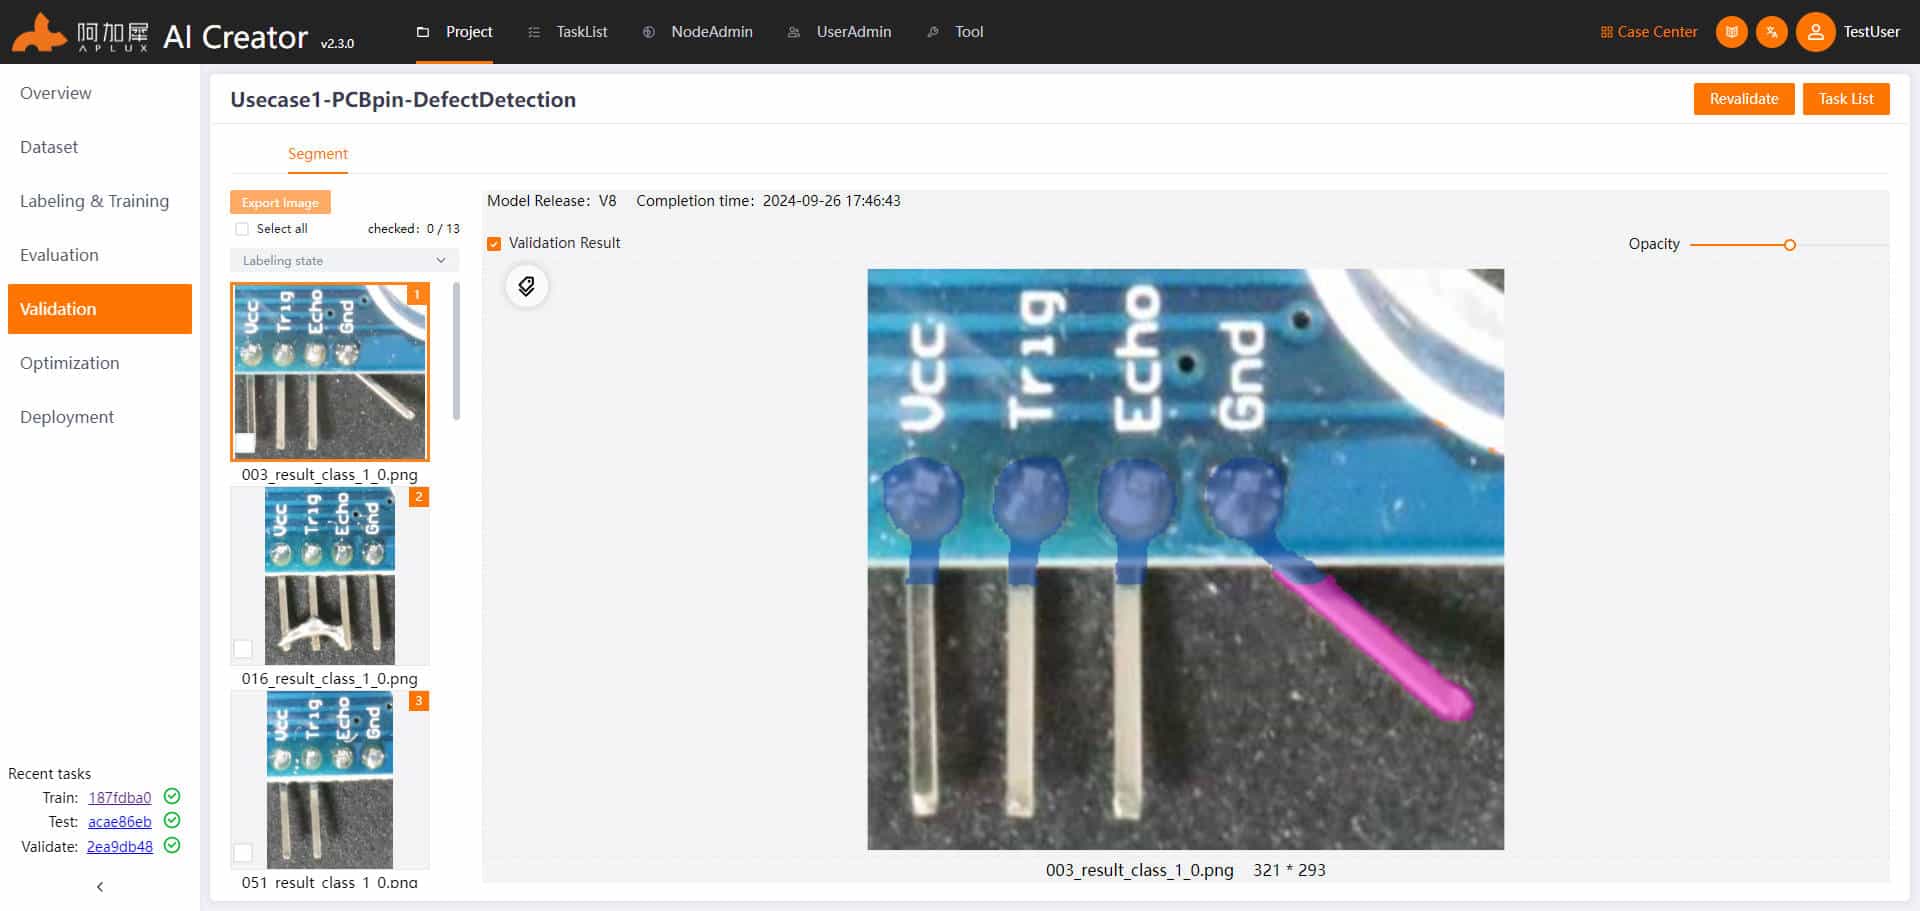
In the model validation page, select test set images and click the "Start Validation" button.
View validation results. After validation is complete, the system will automatically enter the validation results page.
Model Optimization
- Click on "Model Optimization" in the left navigation bar.
- The model trained on the x86 architecture must be converted and optimized to run on ARM architecture edge devices.
AI Creator supports auto optimization and advanced optimization.
Advanced optimization provides more configurable parameters, please modify optimization parameters according to your needs to optimize the model.

Deployment
Click on "Deployment" in the left navigation bar to enter the deployment page.
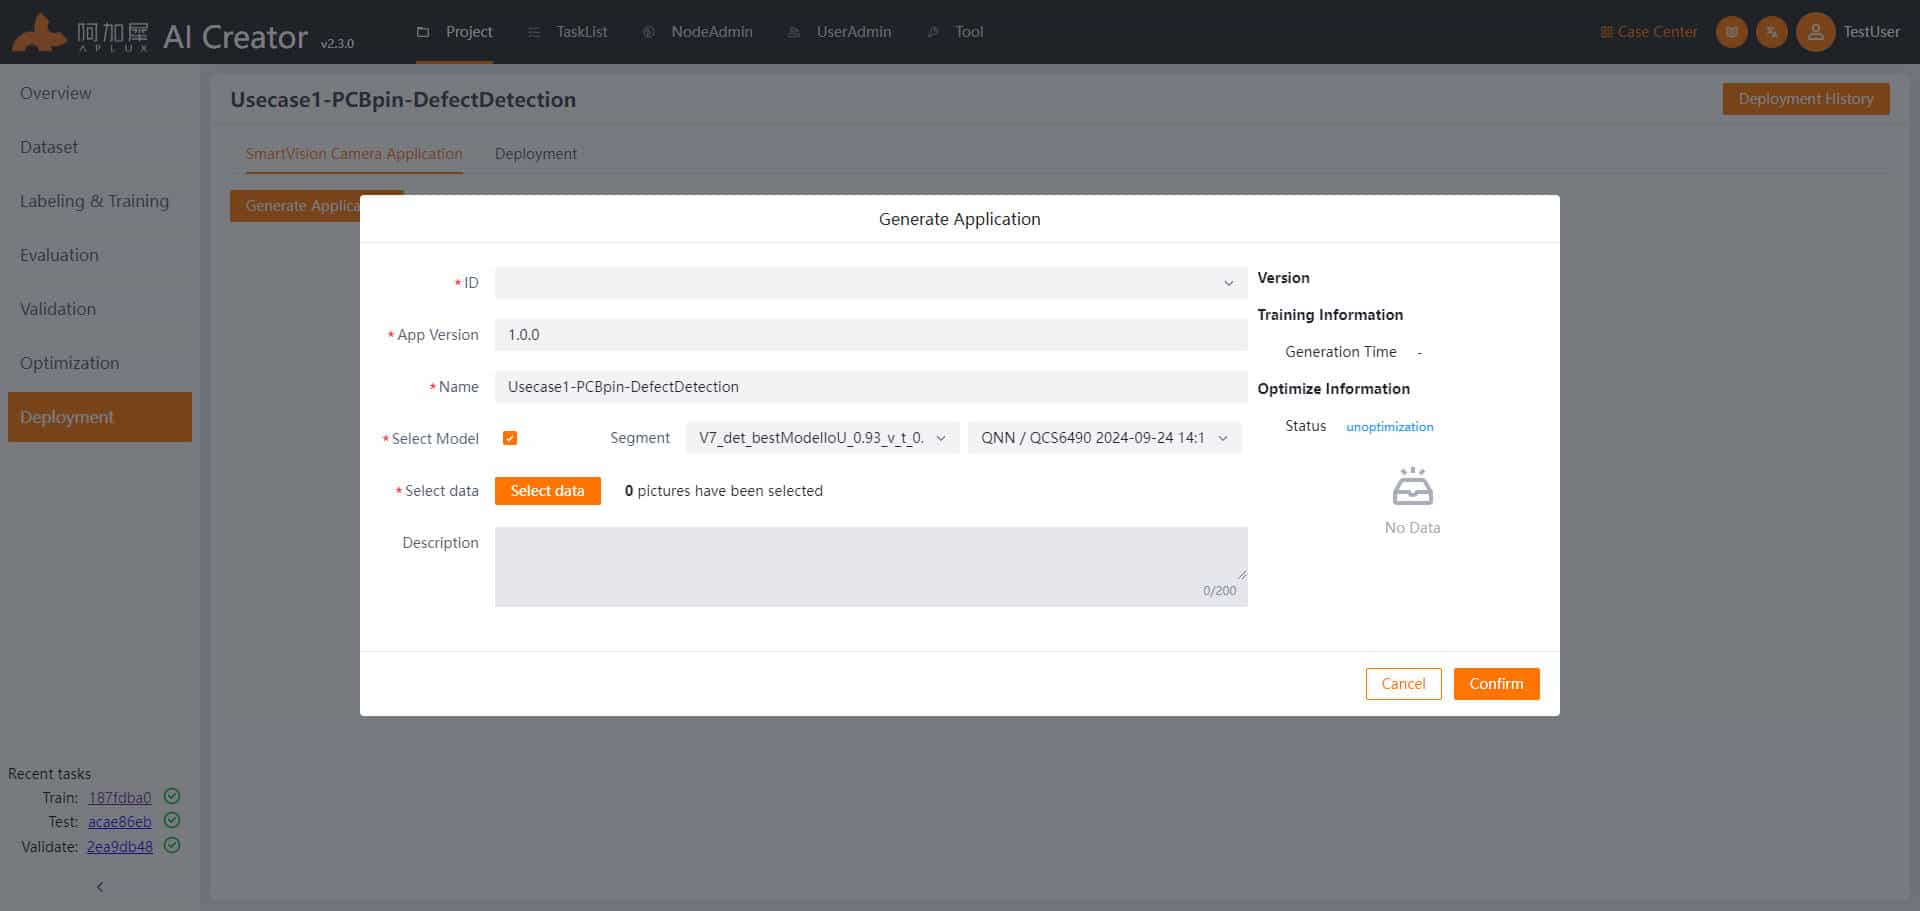
Generate Smart Camera Application
In the deployment page, click the "Generate Smart Camera Application" button. In the popup window, enter the application ID, application version number, application name, and application description; select the published model version and the data (static images for the smart camera to read and infer), then click "Confirm" to generate the smart camera application.
Deploy Application
In the deployment page, click on the "Deployment" tab to enter the application deployment page.
Node Integration
Before deploying a model or application, you need to integrate the device nodes to be deployed.
- Click on the "Node Management" tab at the top of the page to enter the node management page.
- Click the "Integrate Node" button to pop up the integration node window.
- In the integration node window, select IP integration, choose "Smart Camera" in the node type parameter, input the node name and node IP, then click "Confirm"
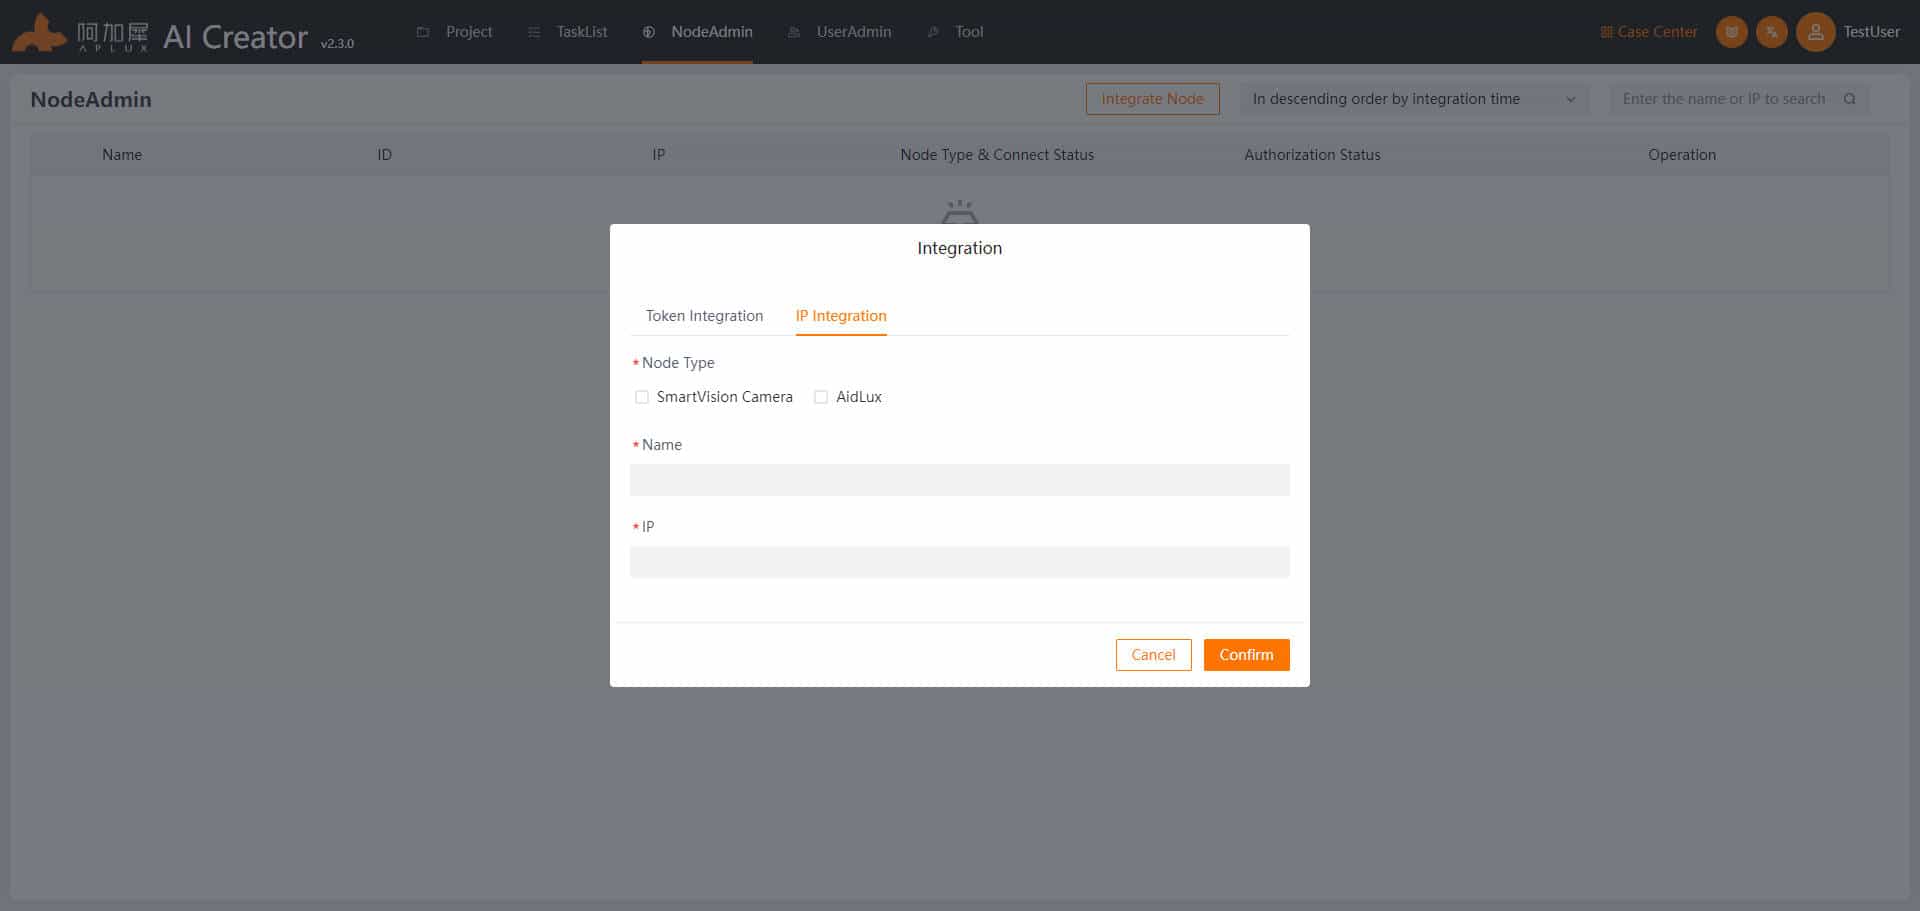
After device integration, the "Node Type & Connection Status" will show "Smart Camera: Online"
Return to Project Deployment Page
Click "Project Center" in the current project's action list, click "Enter Project" -> "Deployment" to enter the main deployment page.
Deploy Smart Camera Application
In the deployment page, click the "Deployment" tab, and in the action list of the created smart camera node, click "Deploy Application" -> "Deploy"

Validation of Deployed Application
After the application deployment prompt is complete on AI Creator, run the deployed application on the smart camera node and check the results.
TIP
This part is not an AI Creator function, but only provides direction for the next steps.